Presentation
![]()
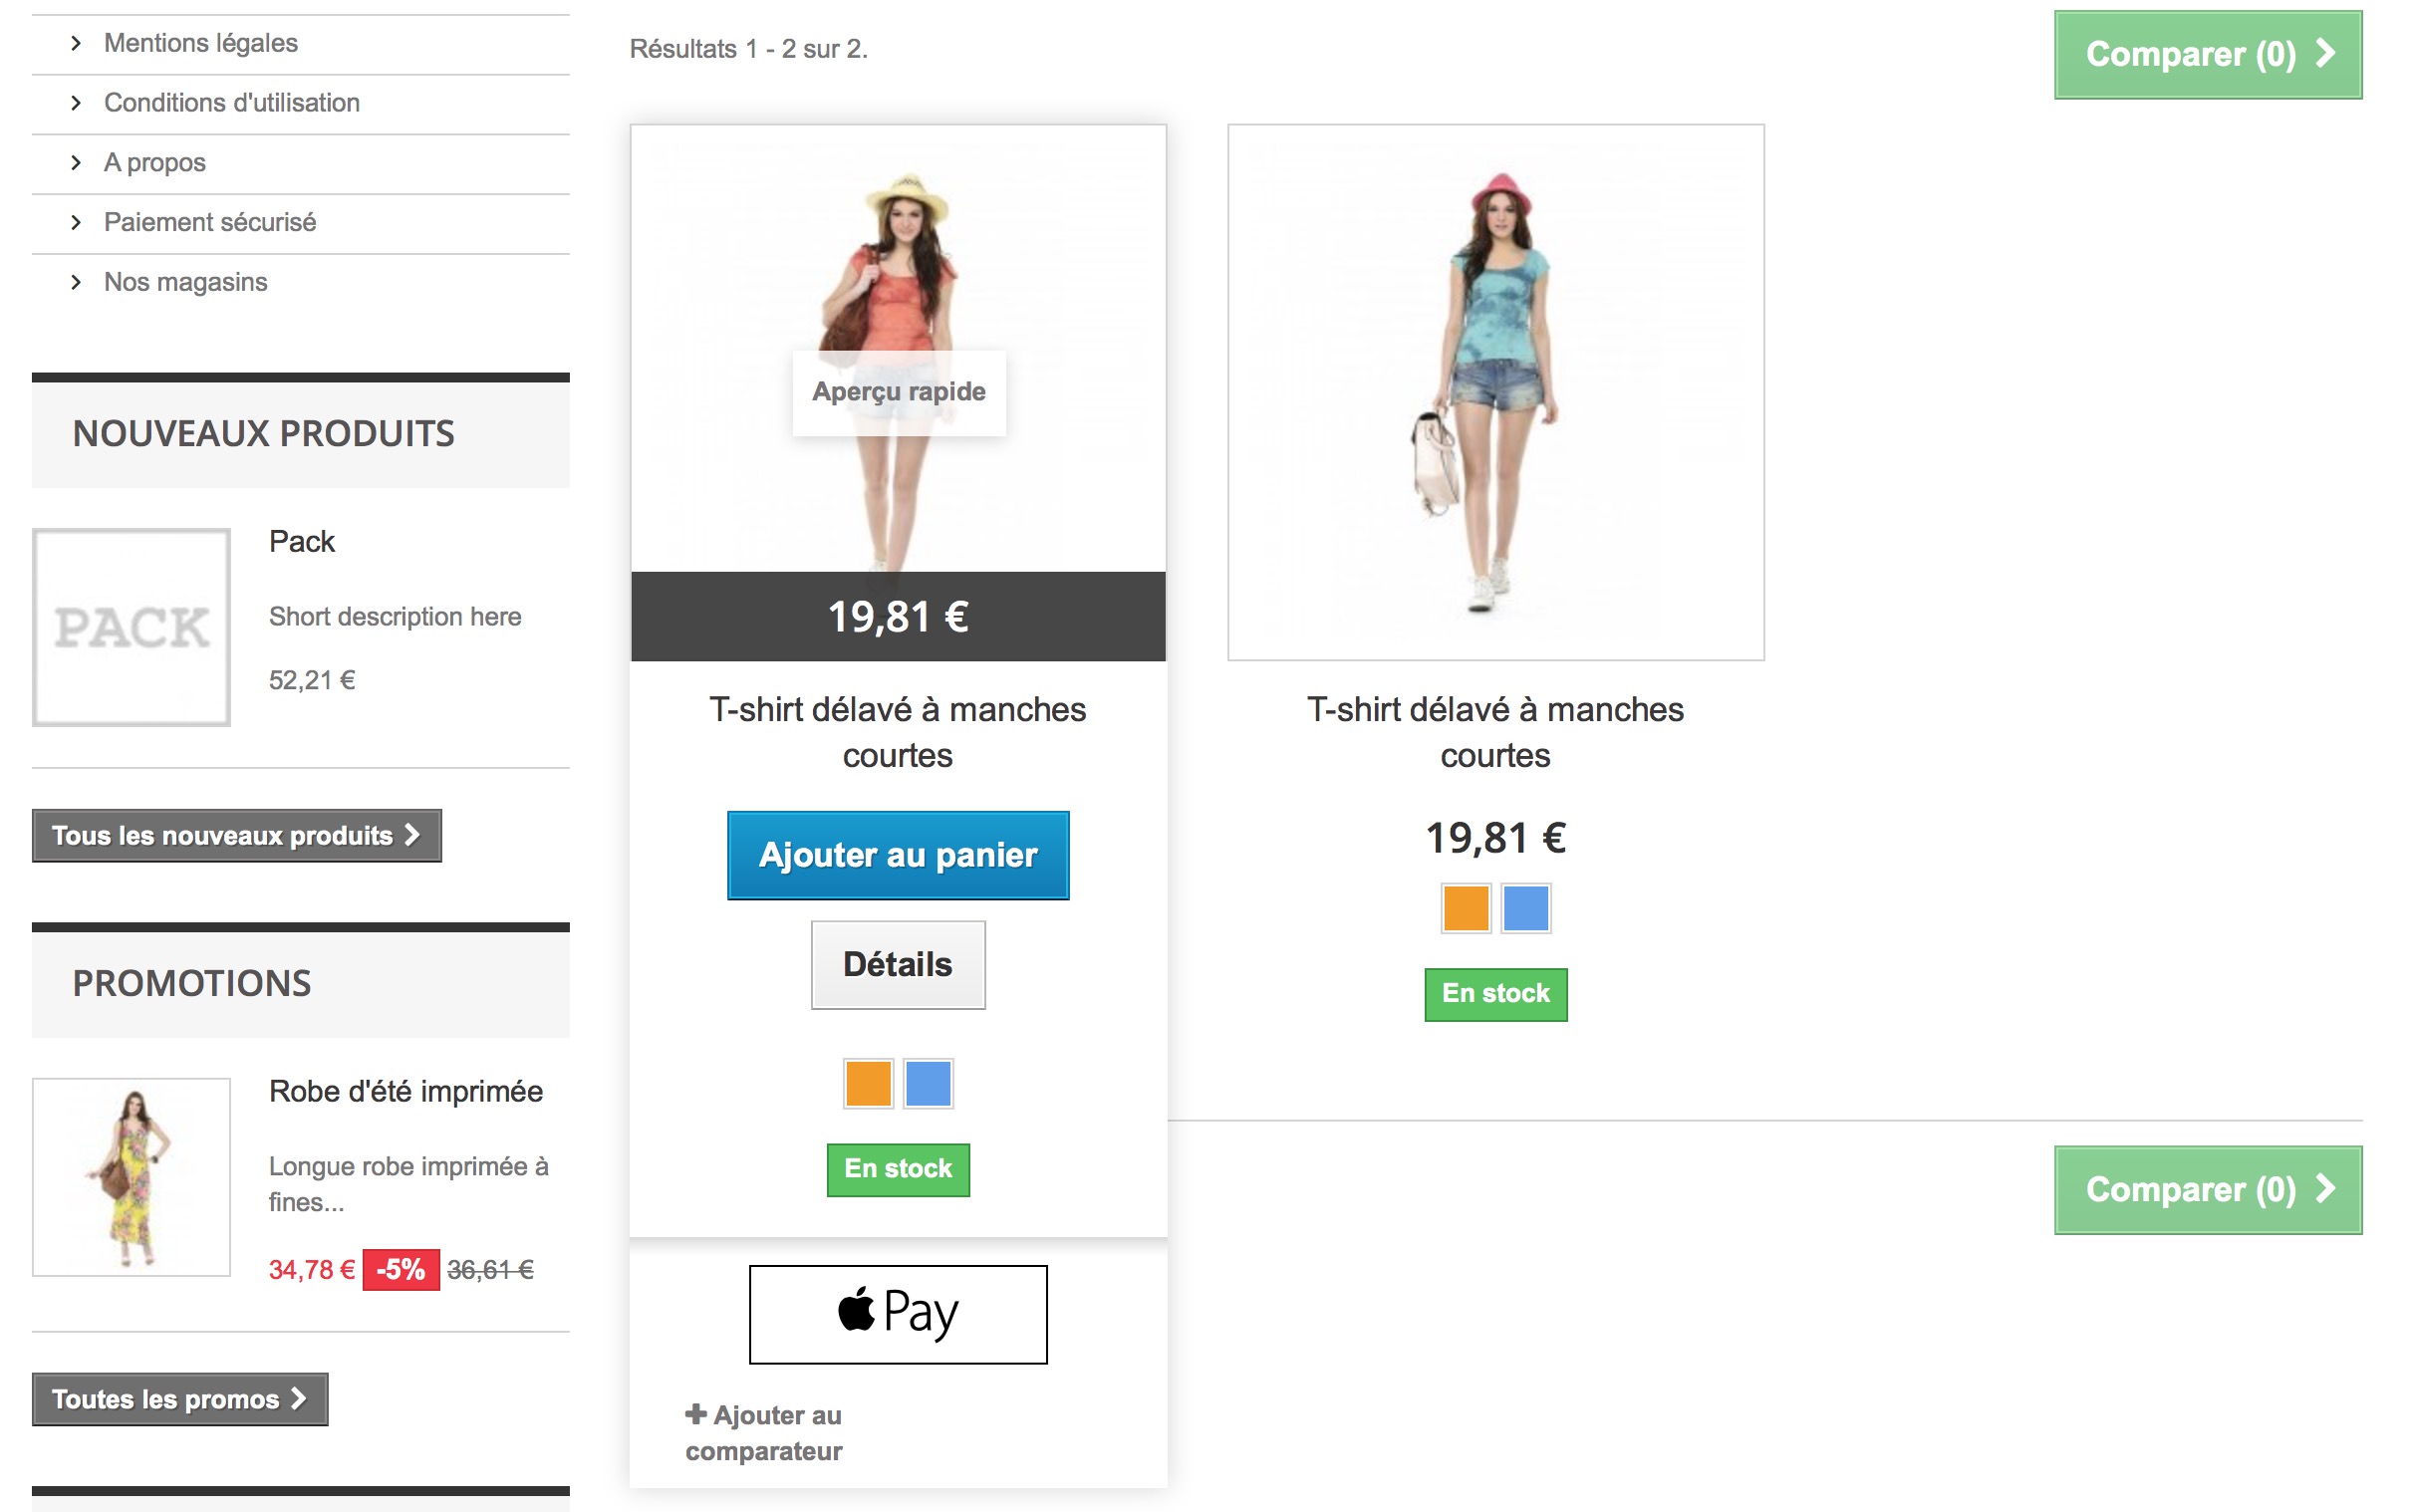
Apple Pay module for PrestaShop will increase your transformation rate by purposing a new and secure payment method to your customers. In more, it will save your customers time by avoid them to type their personal informations required for their order.
This is very simple : your customer chooses one or several products, then click or touch the Apple Pay button to get a recap of his order and its shipping adress. He validates his order by putting his finger on its iPhone or iPad Touch ID, or by double clicking its Apple Watch.
General Points and Operating Principles
Our Apple Pay module uses Stripe’s technology to ensure you a quick and cheap integration.
No hidden fees or mensual fees. A simple rate by transaction will be applied by Stripe directly. For more information about their prices, please see this page : https://stripe.com/pricing
Install Apple Pay
To install Apple Pay, see our tutorial on how to install a module here.
Configure Apple Pay
Display Settings
Apple Pay button style

This option allows you to define the style of the Apple Pay button.
The offered styles are imposed by Apple, and can’t be modified more than what we offer
Show Apple Pay button on product page

This option allows you to display an Apple Pay button directly on your product pages, in the “Add to cart” block.

Show Apple Pay button on product list

This option allows you to display an Apple Pay button for each product in the product list on categories pages.
Stripe
Live mode

This option allows you to turn on Live Mode.
Once you go live, the transaction are debiting the bank account used while paying with Apple Pay.
When this option is disabled, no account debiting is performed while paying with Apple Pay.
Stripe API credentials
The following options are allowing you to enter the Live API Keys of your Stripe account. These keys are required in order to validate the payments made with Apple Pay when the module is in Live Mode.
Live Secret Key

This option allows you to enter the Live Secret Key from your Stripe account.
Live Publishable Key

This option allows you to enter the Live Publishable Key from your Stripe account.
Stripe Manual Domain Validation Tutorial
In case the automatic domain validation failed, we are going to use Stripe to proceed so you can use Apple Pay on your shop.
Apple requires the domain of your shop to be verified to authorize Apple Pay.
To do so, please go to the Stripe documentation, and look for the “Verifying and registering your domain to enable live payments” part. Explanations are given about domain verification.
You will have to download a specific file using the link given in the “1” part of the explanations, named “this file”. The downloaded file must be placed in the “/.well-known/apple-developer-merchantid-domain-association” folder of your shop.
For example, if your domain is https://shop.com, then the file must be accessible at “https://shop.com/.well-known/apple-developer-merchantid-domain-association”.
It is important that the file is accessible from the Internet, otherwise you won’t be able to verify your domain to Apple, and won’t be able to offer Apple Pay.
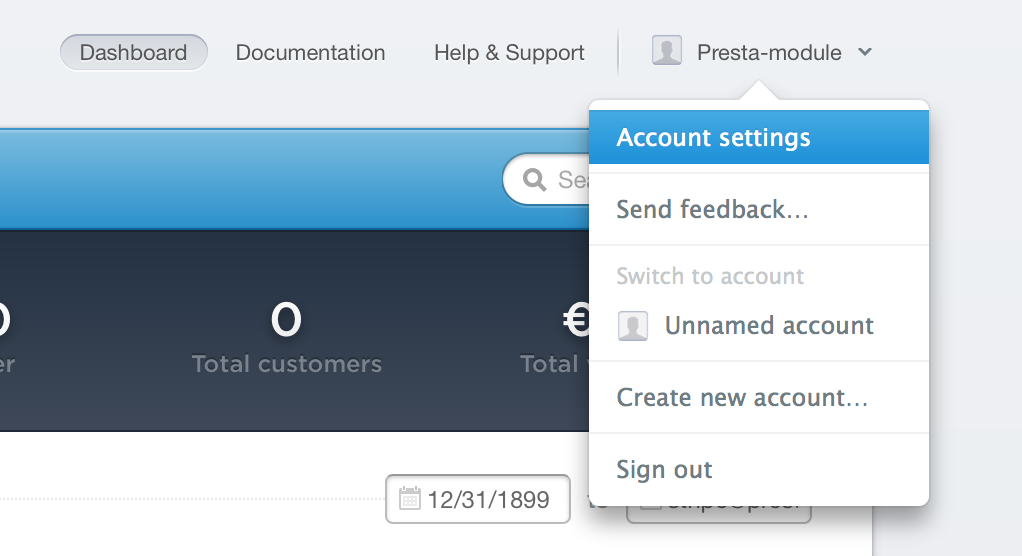
Once the file is correctly placed, connect to your Stripe account.
Click on your name at the top-right corner, and then click the “Account Settings” link.
Go to the “Apple Pay” tab, and use the “Add new domain” button to registrer your domain to Apple through Stripe. Follow the steps, and validate. If the previous file was correctly placed, then your domain will successfully be verified.
Once your domain is verified, click on the “API Keys” tab. You will find your Test and Live API Keys which will be used by the module to validate the payments.
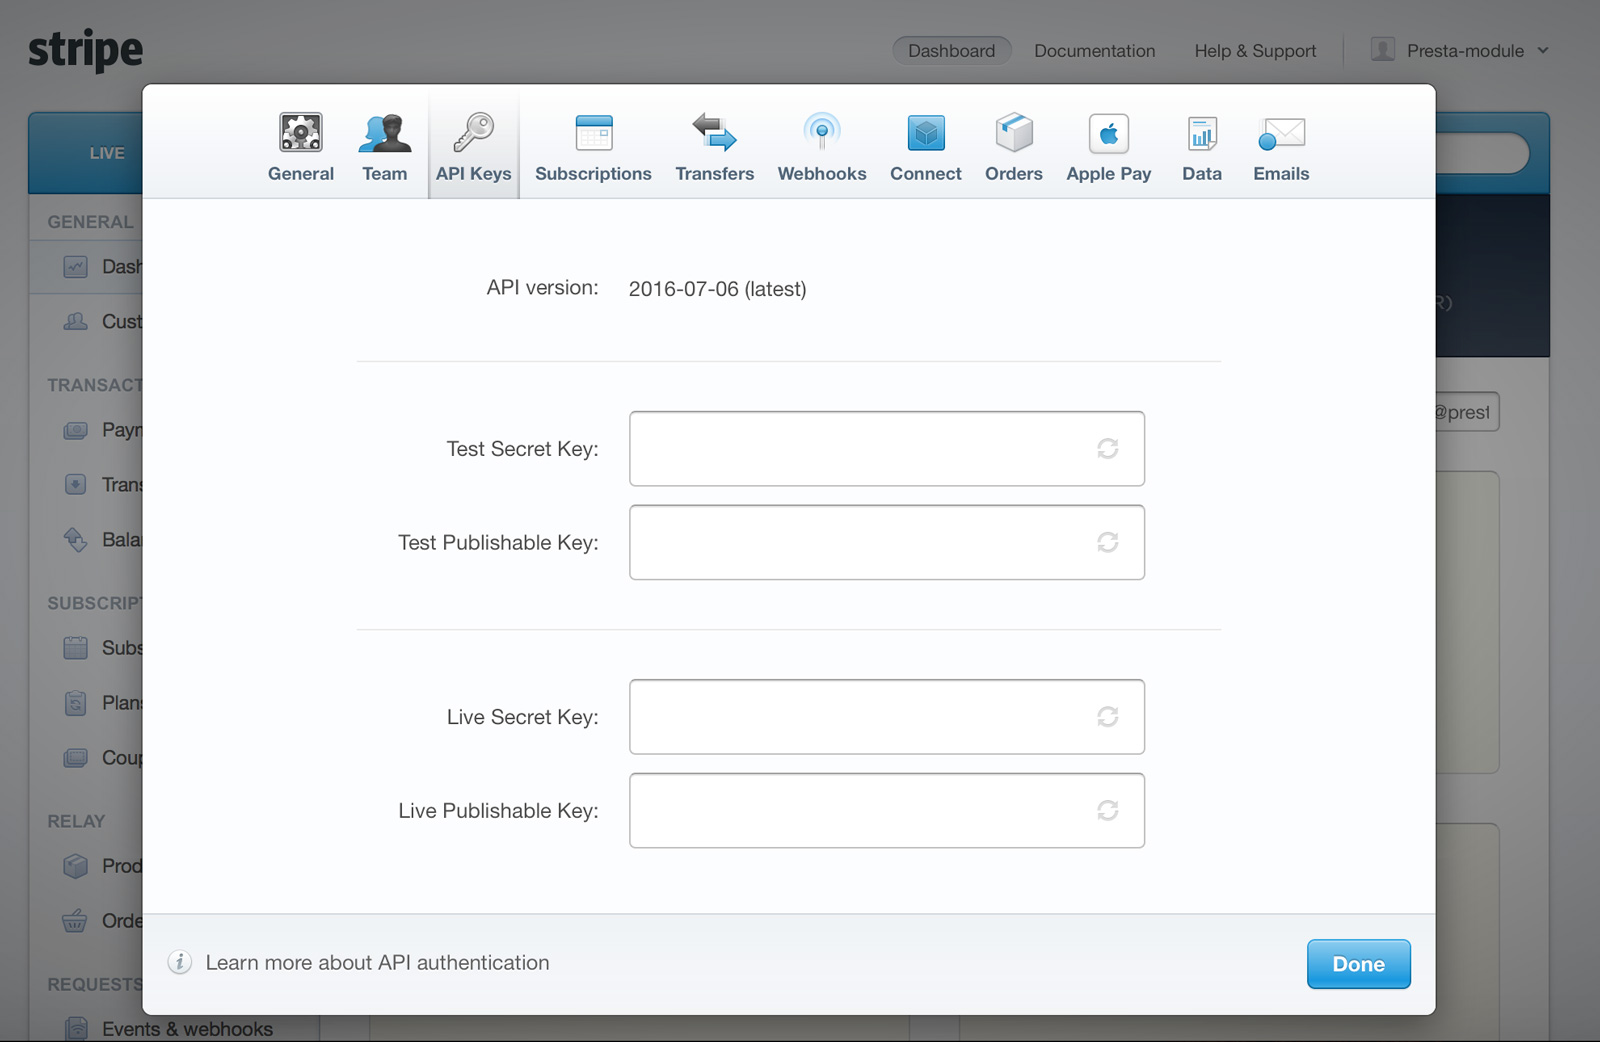
Insert the matching keys in the module’s fields, and save your configuration.
You can now use Apple Pay 🙂