Presentation

The “Advanced Subscription” module for PrestaShop allows you to increase the loyalty of your customers by offering them to subscribe to one or more of your products. They also have the possibility to pre-pay their subscription for a chosen period. On your side, thanks to this automated system of order creation and secure automatic debit, you save time and have the assurance of a regular turnover.
Installation
To install the “Advanced Subscription” module, you can read our tutorial on how to install a module, available here.
We recommend that you configure your server with the “max_execution_time” parameter set to 0, in order to avoid timeout problems when running CRON tasks.
Configuration
A/ Rules
1- Order creation rules
a. Renewal Planning:
Choose the rule for scheduling renewals. Depending on the choice you make, some options will appear allowing you to complete the configuration. You can give your customers more or less freedom in choosing their renewal date.
a.1 Planning “Free”
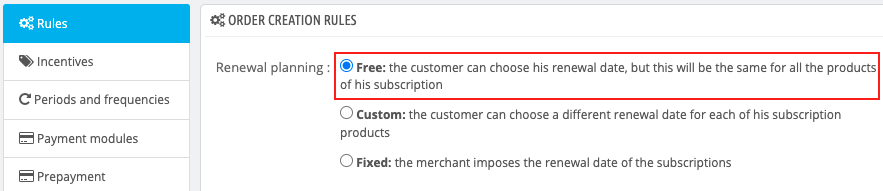
In this case, the customer can choose the renewal date of his subscription. This date will be the same for all the products of his subscription.
a.2. Planning “Custom”
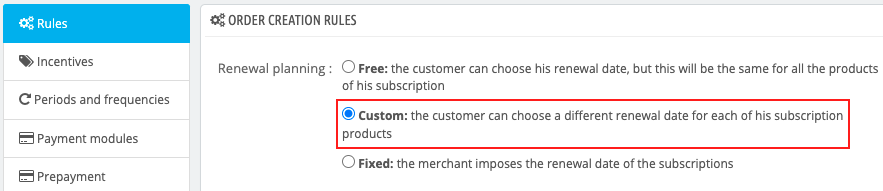
In this case, the customer can choose a different renewal date for each product of his subscription.
a.3. Planning “Fixed”
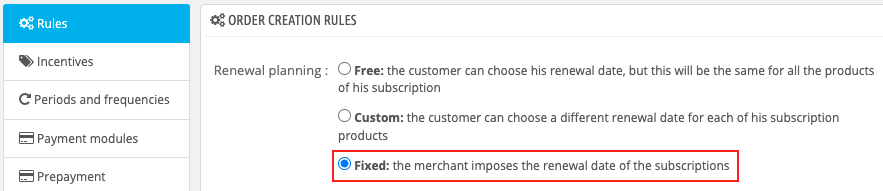
In this case, you set the renewal date for all your customers’ subscriptions.
b. Common options regardless of the renewal planning rule
b.1. Renewal date moved to Friday
If the renewal date of a subscription of one of your customers falls on a weekend, you have the possibility to advance it to Friday. To do so, activate the option “Use the previous Friday if the renewal date falls on a weekend”:

b.2. Possibility to modify the next order
To set the number of days before the renewal date below which your customers cannot shift, change or cancel their next delivery, use the following option:

Attention: for reasons of bank authorization delays, you cannot indicate a number higher than 7.
b.3. Number of payment attempts
Then specify the number of payment validation attempts allowed before the order goes into error:

b.4. Postponement of the next order
If you want to give your subscribers the option to postpone their next delivery, select “Yes” for the following option:

b.5. Converting a one-time order into a subscription
If you want to give your customers the possibility to transform their one-time order of a product into a subscription, select “Yes” for the following option:
![]()
Don’t forget to save your options.
c. Options depending on the renewal planning rule
c.1. Planning “Free”: deactivation of the possibility to change the renewal date
With a “Free” planning, your customers have the possibility to change their renewal date. However, if you do not want this to be the case anymore, you can deactivate this possibility by selecting “No” to the next option:

c.2. Planning “Fixed”: configuration of the imposed renewal date
In the case of a “fixed” planning, you decide the renewal date of all your customers’ subscriptions.
Choose the day of the month (number) for the renewal of monthly subscriptions.
For example:

Knowing that if this day falls on a weekend, you have the possibility to shift the renewal exceptionally to the previous Friday through the option “Use the previous Friday if the renewal date falls on a weekend” (see option b.1).
Then choose the day of the week for the renewal of weekly subscriptions.
For example:

If you want your customers not to be debited on the day they place their order containing the subscription, but on the next “renewal day” (set above), activate the following option:
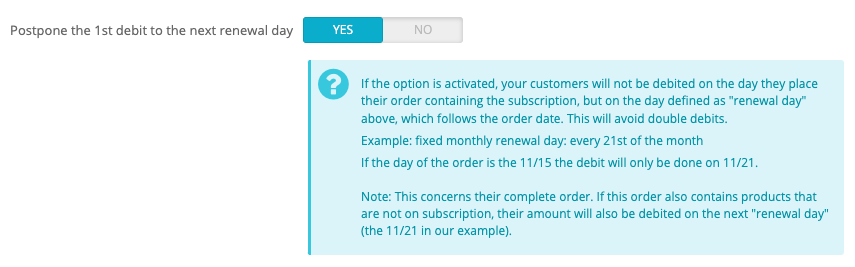
This will avoid double debits.
2. Immediate orders
If you want to allow your customers to place an order immediately, without waiting for the next due date, you can activate the following option:

Attention: this option does not apply to “on subscription only” products.
This option is particularly interesting in the case of a “fixed” renewal planning. Indeed, if you renew subscriptions on the 15th of the month but someone subscribes on November 16th, by activating this option you will be able to give him the benefit of the November 15th order. Their next renewal date will be the 15th of the following month, i.e. December 15th, as configured.
Indicate the minimum number of days required between 2 immediate orders. This allows you to prevent the creation of two immediate orders too close together:

In the event that a customer decides to place an order immediately, if you want to shift the due date to be recalculated from the date of the immediate order, select “Yes” for the following option:

3. Customer group for subscribers
If you want the customers who have taken a subscription to be placed in a particular customer group, select it through the following drop-down menu:

The customer group must have been created beforehand in the settings of your PrestaShop store.
4. Vouchers
To allow your customers to use discount codes on their subscription price select “Yes” for the following option:
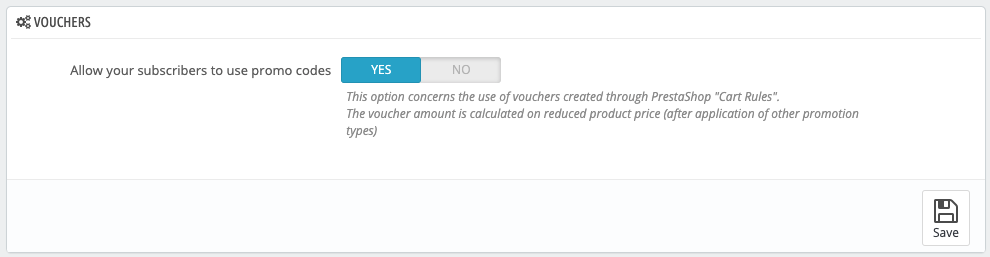
Attention: This option concerns the use of discount codes created through PrestaShop “Cart Rules”. The amount of the discount is calculated on the reduced price of the product, that is to say after application of other types of promotions.
5. Page for the terms of subscription use
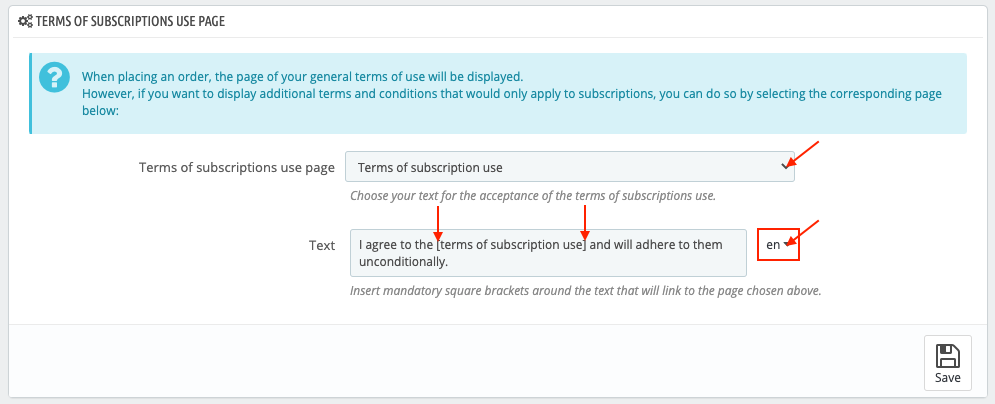
When you place an order, your terms and conditions page will be displayed.
However, if you want to display additional terms and conditions that would apply only to subscriptions, you can do so by selecting the corresponding page below and then setting a text related to the acceptance of these terms (in all the languages of your store).
Attention: you must include a text between brackets to indicate to the module where the link should be positioned:
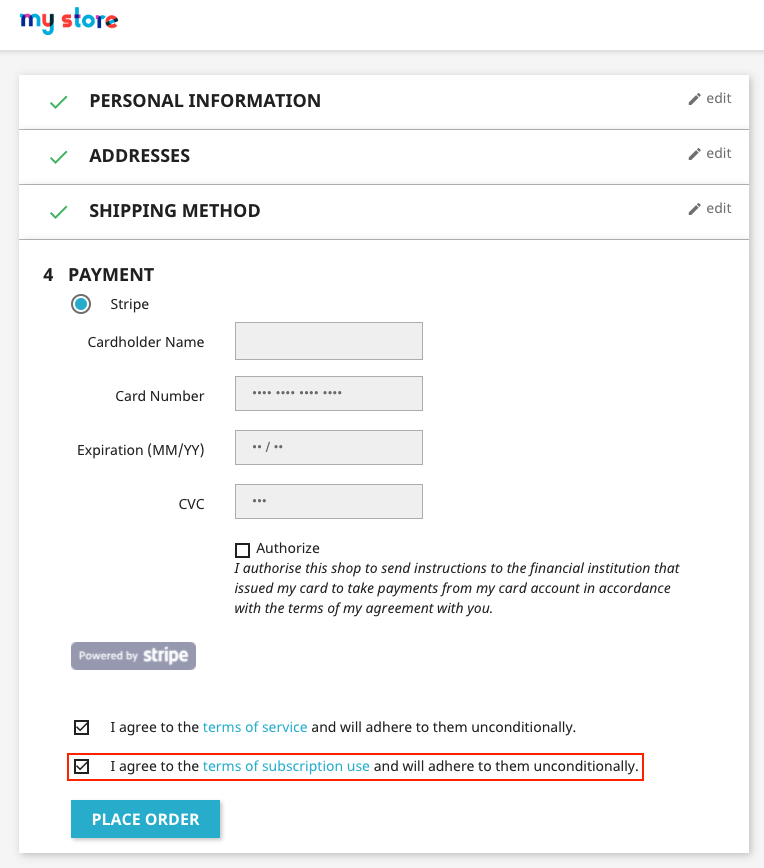
Your customers will have to check a box to accept these additional conditions in order to validate the payment of their subscriptions:
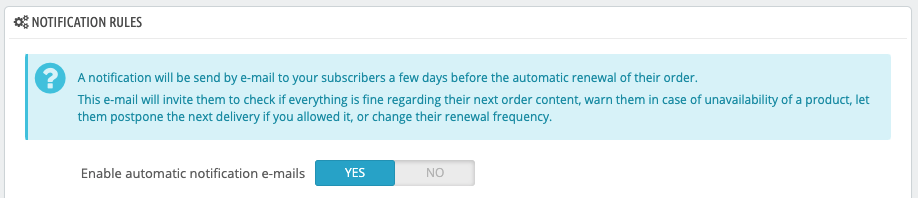
6. Notification rules
Select “Yes” to activate the sending of a summary email to your customers, a few days before their order is automatically renewed:
This email:
- will invite them to verify that their next order is in accordance with their expectations
- will warn them if one of the products is unavailable
- will give them the opportunity to reschedule the next delivery (if you have allowed it)
- will allow them to change their subscription frequency, if needed
Indicate the number of days before the renewal date for sending this email, as well as the time of sending:
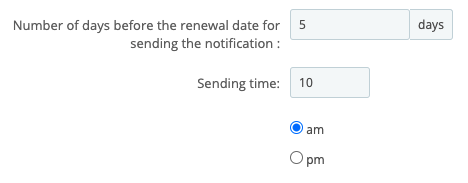
Attention: the number of days cannot be less than (or equal to) the number of days corresponding to the period during which your customer cannot postpone, modify or cancel their next delivery (see option b.2).
If the sending date falls on a weekend, you have the possibility to advance the sending of the notification email to the previous Friday, by selecting “Yes” for the following option:

B/ Incentives
This tab allows you to define specific promotion rules for subscriptions.
First, select the criteria from which you want to create your discounts:
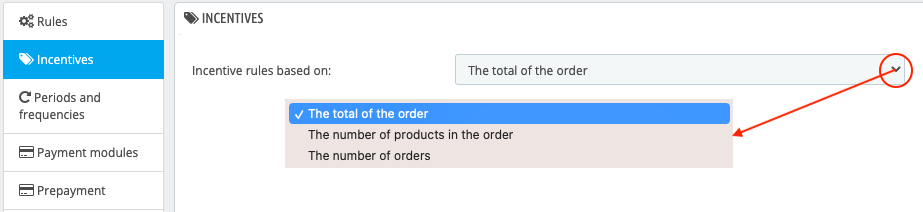
You have the choice between:
- A discount based on the total of the order
- A discount based on the number of products in the order
- A discount based on the number of orders
You can only choose one criterion at a time. If you change the criterion, the previously created rules will be deleted. However, you can define several rules (several “slices”) for each customer group, and define different discount rules per customer group.
Select a first client group for which you want to create discount rules, then click on “Add this group”:
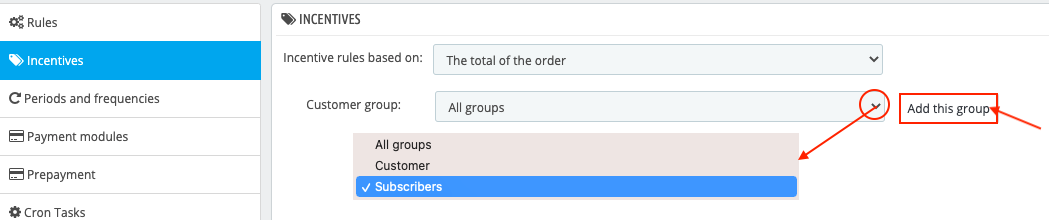
A tab opens to allow you to configure the discount rules for this customer group.
- If the rule is based on the total of the order: indicate the amount (excl. tax) from which the discount applies, the amount of the discount (or its percentage) and specify if you want to offer delivery. Don’t forget to save.
Example:
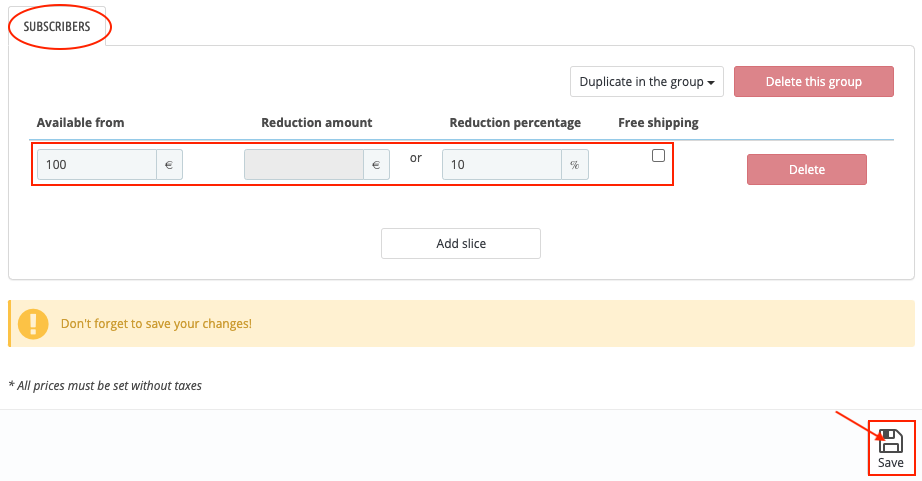
In this example, customers of the “Subscribers” group will benefit from a 10% discount from 100€ excl. tax, but not from free delivery.
- If the rule is based on the number of products in the order: indicate the number of products from which the discount applies, the amount of the discount (or its percentage) and specify if you want to offer delivery. Don’t forget to save.
Example:
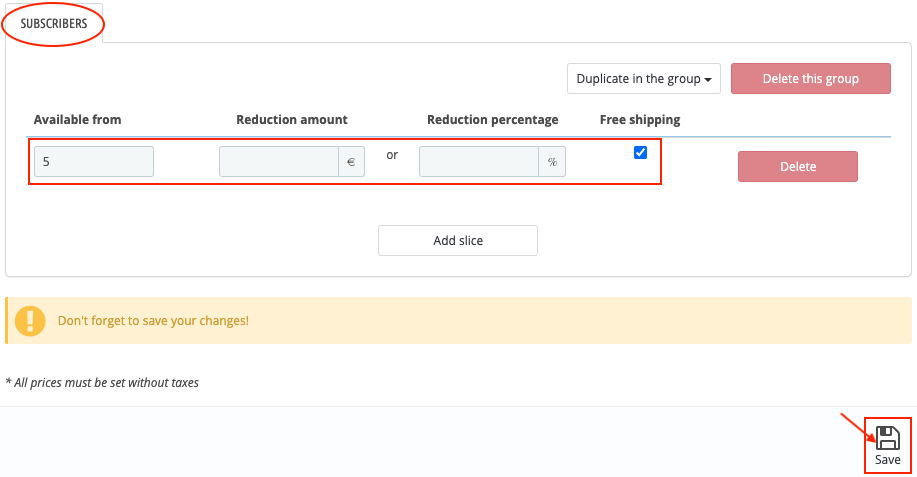
In this example, the customers of the group “Subscribers” will benefit from the free delivery from 5 ordered products.
- If the rule is based on the number of orders: indicate the order ID from which the discount applies, the amount of the discount (or its percentage) and specify if you want to offer delivery. Don’t forget to save.
Example:
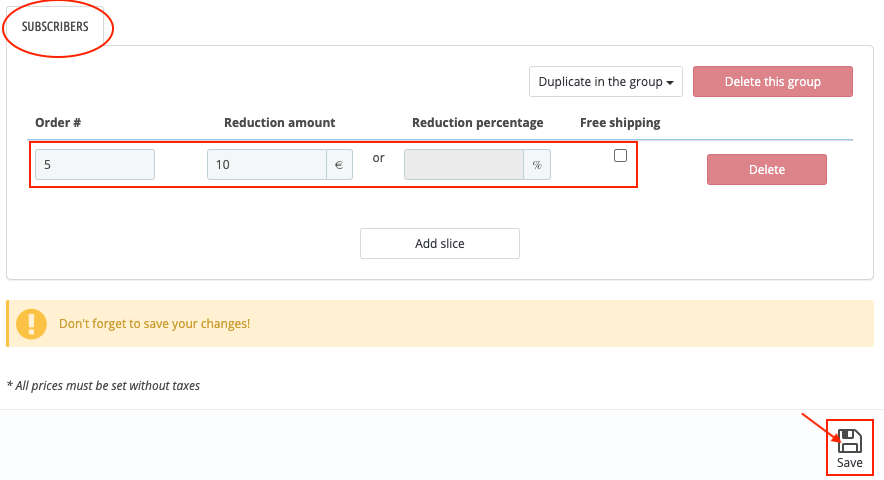
In this example, the customers of the “Subscribers” group will benefit from a 10€ (excl. tax) discount from the 5th order.
Click “Add slice” to add more discount rules for the selected group.
You can also copy rules from one customer group to another, using the “Duplicate in the group” button. This will clone the rules from the current tab to a new tab, corresponding to the newly selected customer group.
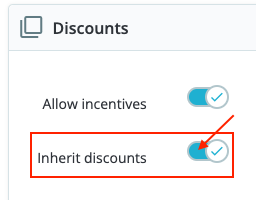
Once you have created your incentives rules, you must indicate, through each product file concerned by the subscription, if you authorize the use of these incentives. Indeed, you are not obliged to apply these discounts to all your subscription products. Only those for which you have checked the box “Allow incentives” in the “Subscription” tab will be concerned:
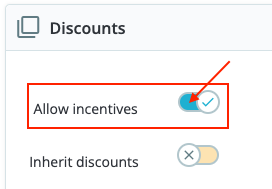
Note that you also have the possibility to take into account the specific prices defined for the product by checking the “Inherit discounts” option:
C/ Subscription frequencies and order creation periods
1. Subscription frequencies
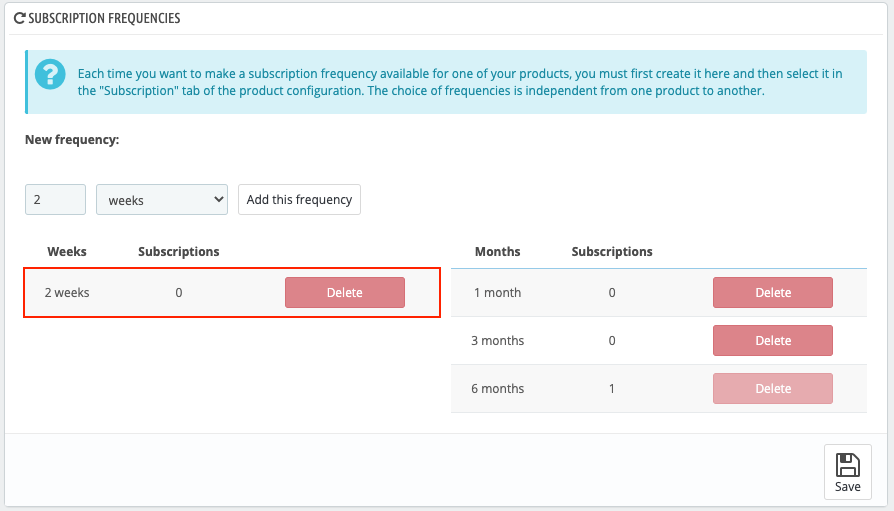
The “Periods and frequencies” tab allows you first to create subscription frequencies. Once these frequencies are created, they will be available in each product file, through the “Subscription” tab. All you have to do is select the ones you want to make available for the product concerned. The choice of subscription frequencies is therefore independent from one product to another.
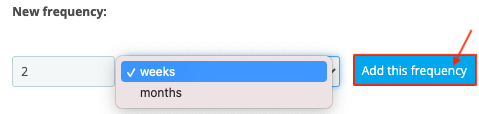
To create a new frequency, enter a number, select “weeks” or “months” and click “Add this frequency”.
Example of adding a “2 weeks” subscription frequency:
You will see the new frequency appear in the list of available frequencies:
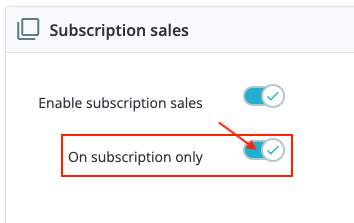
Once your frequencies are created through the module configuration, go to the “Subscription” tab of each product concerned and activate the subscription sale:
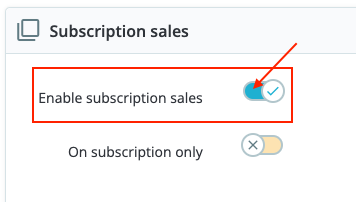
If you want this product to be sold on subscription only, check “On subscription only”:
Among the frequencies you have created, check the ones that will be available for the product, then define the one to be selected by default.
Example:

Note: if you have activated the option “Highlight the most selected frequency” in the visual options of the module (see part G/ of this documentation), as soon as you get subscriptions for the product, it will no longer be the frequency defined here “by default” that will be selected on arrival on the product file, but the frequency most used by your customers.
2. Allowed periods for the creation of orders
The second part of the tab “Periods and frequencies” of the module concerns the periods allowed for the creation of orders.
If, for logistical reasons, you want orders to be created only on certain days of the week, or certain months of the year, you can indicate this in the “Allowed periods for order creation” part of the “Periods and frequencies” tab.
Leave checked the days and months during which orders can be created and uncheck the others.
Example:
If you do not want to create orders on Saturdays and Sundays, or during the month of March, uncheck them in the table:

D/ Payment modules
a. Payment module configuration
First of all, please read this FAQ to know more about the different payment modules delivered with “Advanced Subscription”.
“Advanced Subscription” comes with two modules that automatically handle recurring payments: Stripe and PayPlug. The 3 other payment methods offered for subscriptions are extensions of the standard PrestaShop payment modules (“Bank transfer”, “Payments by check”) as well as a cash on delivery module. These 3 standard methods do not support automatic debit (a payment validation action from your customers will be required).
We therefore strongly advise you to use one of the two automatic recurring payment methods: Stripe or Payplug. Creating an account and subscribing to one of their offers is necessary before configuring these payment methods through the module. You can find more information about Stripe’s rates here, and PayPlug’s rates here (please note that in order to use PayPlug’s solution for recurring payments, you will need to subscribe to at least the “Pro” offer).
1. Payment by Stripe
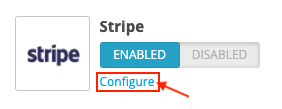
To configure the Stripe payment module, click on “Enabled” to activate the payment method:

Click on “Configure”:
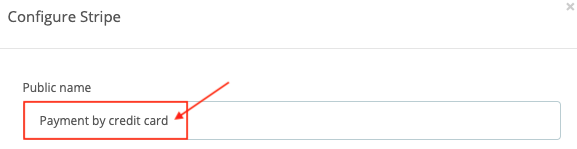
Choose the public name to associate with this payment method. This is the name that will be displayed to your customers for this payment method in the order tunnel. Indeed, your customers may not know Stripe, so you can simply write “Payment by credit card” for example, to facilitate understanding:
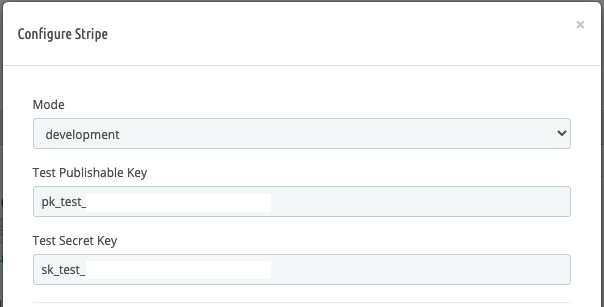
If you want to test subscription payments through Stripe first, select the “development” mode and enter the test keys that are provided to you in your Stripe online account in the “Test Publishable Key” and “Test Secret Key” fields. They must start with “pk_test_” and “sk_test_”:
A pre-configuration of the order statuses that will be applied according to the status of the orders is saved. You can modify it if necessary. Then save the configuration.
When testing, use the test card identifiers provided by Stripe here.
When you want to switch to production mode (the credit cards used for payments will then be actually debited), go back to the Stripe payment module configuration, select the “production” mode and enter your “Live Publishable Key” and “Live Secret Key” (you will also find them in your Stripe account) then click on “Save configuration”.
2. Payment by PayPlug
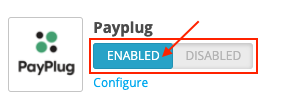
To configure the PayPlug payment module, click on “Enabled” to activate the payment method:
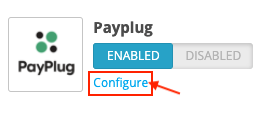
Click on “Configure”:
Choose the public name to associate with this payment method. This is the name that will be displayed to your customers for this payment method in the order tunnel. Indeed, your customers may not know PayPlug, so you can simply write “Payment by credit card” for example, to facilitate understanding:

If you want to test subscription payments through PayPlug first, select the “development” mode and enter the test key that is provided to you in your PayPlug online account in the “Test Secret Key” field. It must start with “sk_test_”:

A pre-configuration of the order statuses that will be applied according to the status of the orders is saved. You can modify it if necessary. Then save the configuration.
During your tests, use the test credit card identifiers provided by PayPlug here.
When you want to switch to production mode (the credit cards used for the payments will then be really debited), go back to the PayPlug payment module configuration, select the “production” mode and enter your “Live Secret Key” (you will also find it in your PayPlug account) then click on “Save the configuration”.
3. Cash on Delivery
This payment method allows your subscribers to pay when they receive their order. No third party module configuration is required.
Attention: this payment module does not allow automatic debit.
4. Payment by cheque
This module is an extension of the default PrestaShop module “Payments by check”, allowing you to propose the payment by check as a payment method for subscriptions. Because it is an extension, the configuration of the default module is inherited, which means that the configuration fields of the “Payments by check” module must be filled in for this payment method to work properly.
Attention: this payment module does not allow automatic debit.
5. Bank Wire
This module is an extension of the default PrestaShop module “Bank transfer”, allowing you to propose bank transfer as a payment method for subscriptions. Because it is an extension, the configuration of the default module is inherited, which means that the configuration fields of the “Bank transfer” module must be filled in for this payment method to work properly.
Attention: this payment module does not allow automatic debit.
b. Case of a cart containing only subscriptions with pre-payment
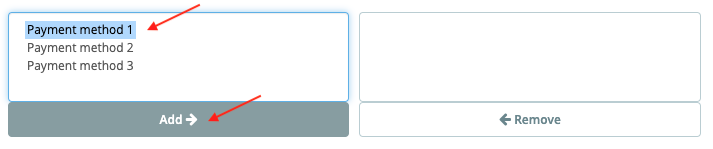
In the case of a shopping cart containing only subscriptions with pre-payment (and potentially products without subscription), you can offer your customers to pay their order with the payment modules configured on your store and not supported by the subscription module. To do so, select the concerned modules in the left column, click on “Add” and save:
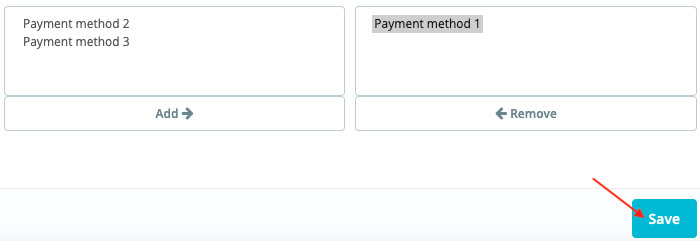
These payment methods will not be offered if the cart contains at least one product on subscription without pre-payment.
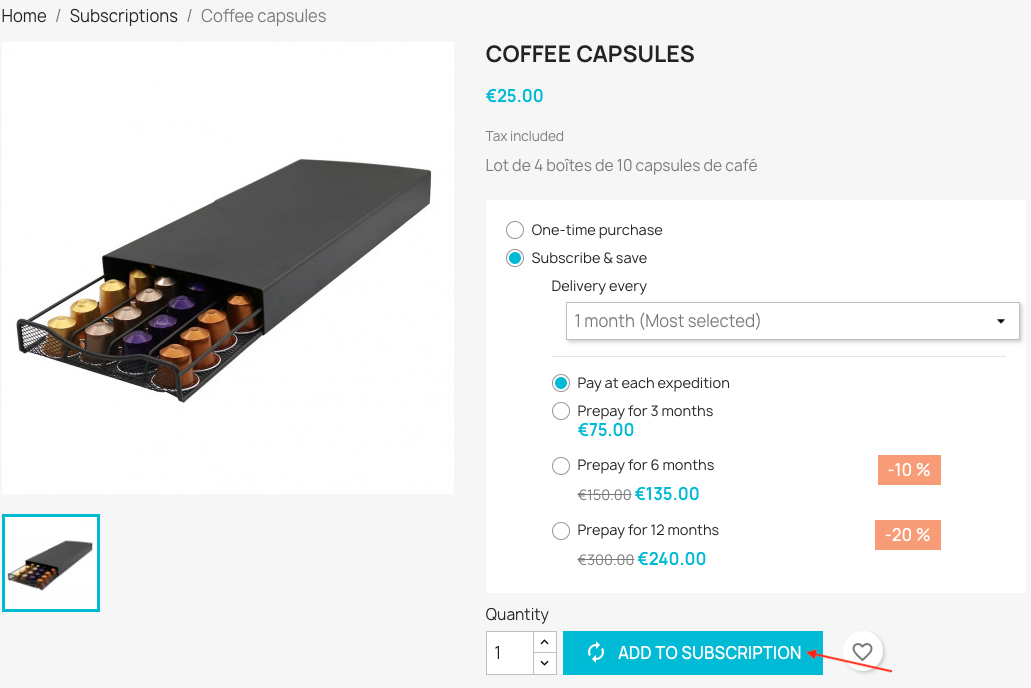
E/ Prepayment
You have the possibility to allow your customers to pre-pay their subscription over a certain period. This allows you to ensure the payment of orders for a certain period of time and to have a better control of the products’ stocks. To encourage your customers to pay in advance, you can also offer them different types of discounts in exchange.
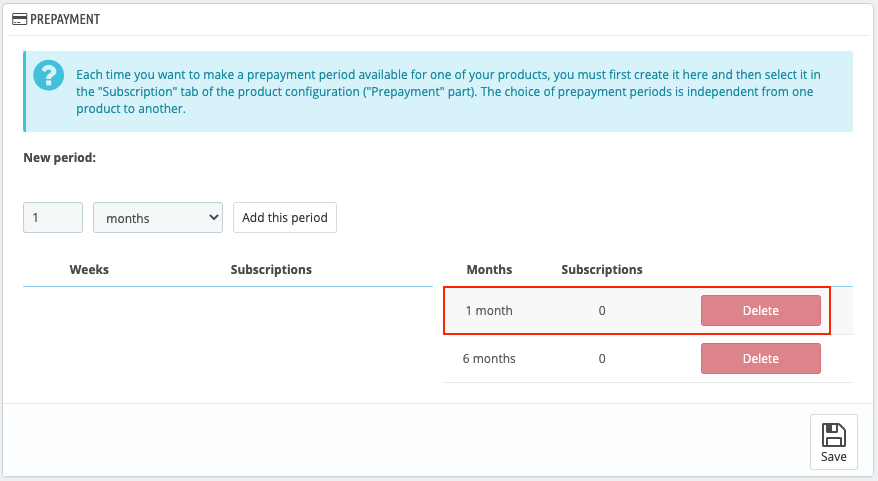
First of all, you need to create the pre-payment periods you want to make available. You will then be able to select only those you wish to offer for each product independently.
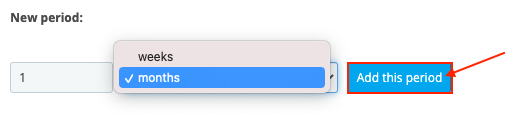
To add a new pre-payment period, enter a number, select “weeks” or “months” and click “Add this period”.
Example of adding a “1 month” pre-payment period:
You will see the new period appear in the list of available pre-payment periods:
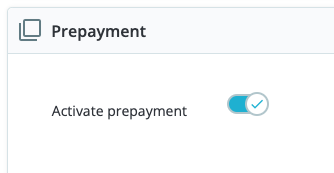
Once your pre-payment periods have been created through the module configuration, go to the “Subscription” tab of each product concerned and activate the pre-payment:
If you want to automatically renew the payment for the same pre-payment period, check the “Renew payment automatically” option and select “For the same period” in the “Renewal type” option:

If, on the other hand, you want to automatically renew the payment but, this time, at each shipment (thus no longer activating pre-payment), check the “Renew payment automatically” option and select “At each expedition” in the “Renewal type” option:

Example:
Your customer subscribes to a product with a 2-week renewal frequency. He chooses to pre-pay for 6 months. At the first payment, he will pay for 12 shipments. At the end of the 6 months, you can choose to have him prepay again for 6 months (thus 12 shipments) or to have him pay this time at each shipment (payment of 1 shipment, every 2 weeks).
You can also offer a discount to encourage your customers to pre-pay their subscription. To do this, first select the pre-payment periods you allow for the product, and then specify a discount percentage for each. If you do not want this discount to be cumulative with the incentive rules, select “Only apply discounts due to prepayment”. If, on the other hand, you want to allow cumulation, select “Apply discounts due to prepayment and incentive rules”. In the latter case, you must have configured incentive rules in the module and have activated the “Allow incentives” option at the product level.
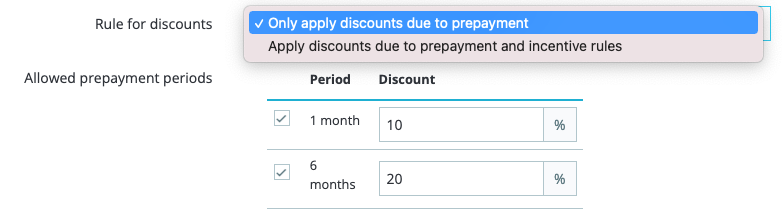
Do not forget to save.
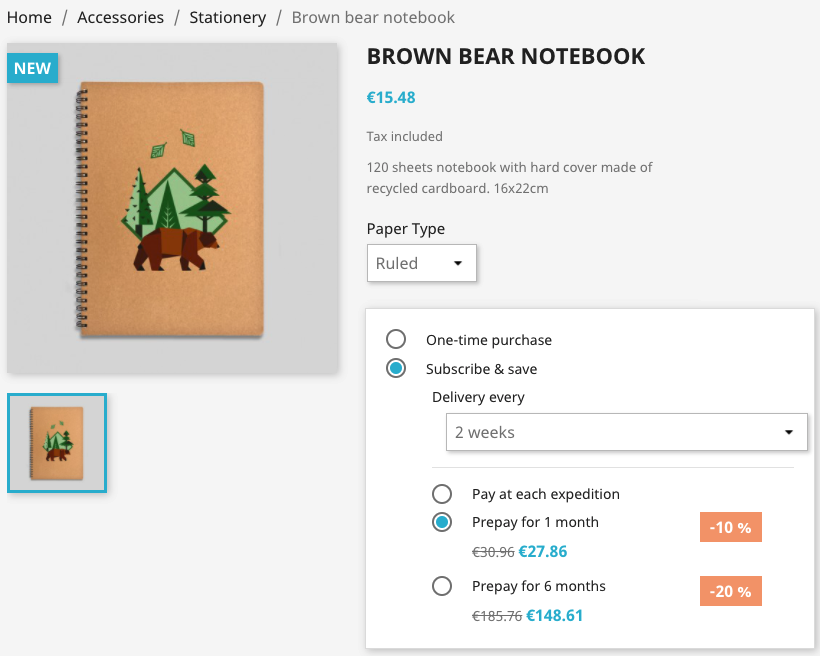
Example of pre-payment options on a product page:
F/ CRON task
a. CRON task configuration
In order to automate the creation of orders and the sending of automatic reminder emails to your customers, you need to create an automated task called CRON task, on your server. If you do not have the possibility to create this automated task, you can use an external service. We recommend that you run this automated task on the same web server where your PrestaShop store is installed.
We provide you with its URL to fill in during its configuration:

Attention: If you have activated the multi-shop mode, you must configure a scheduled task for each store (the CRON URL is different for each store).
Schedule your CRON task to run every hour, every day. You can also run this automated task manually by clicking on the “Execute the cron task manually” button:

b. Automated action segmentation
When the CRON task is executed with the URL provided in the module, it performs the following set of actions:
- before_delivery (sending notification emails before renewal)
- order_creation (order creation)
- order_validation (order validation)
- card_validity (credit card validity verification)
- subscribers_group (update of the subscriber group)
If you want to run only one or some of the above actions, you can add at the end of the CRON URL the ?action= parameter followed by the name of the action to be performed. You can cumulate the actions by separating them with a comma.
For example, if you want to run only the order creation, the URL to execute is :
URL_de_CRON?action=order_creation
where URL_de_CRON is the URL provided.
If you want to run only the order creation and the update of the subscriber group, the URL to execute is :
URL_de_CRON?action=order_creation,subscribers_group
G/ Visual options
This tab allows you to manage your display options.
1. Most selected frequency
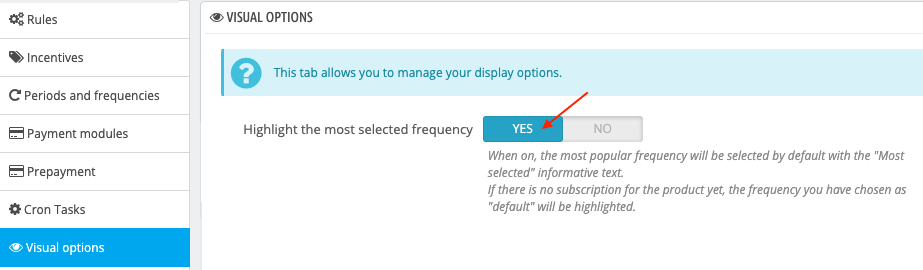
You have the possibility to indicate to your visitors the most chosen subscription frequency for a product. To do this, activate the “Highlight the most selected frequency” option:
This is the frequency that will be selected by default on the corresponding product page, with the mention “Most selected”:
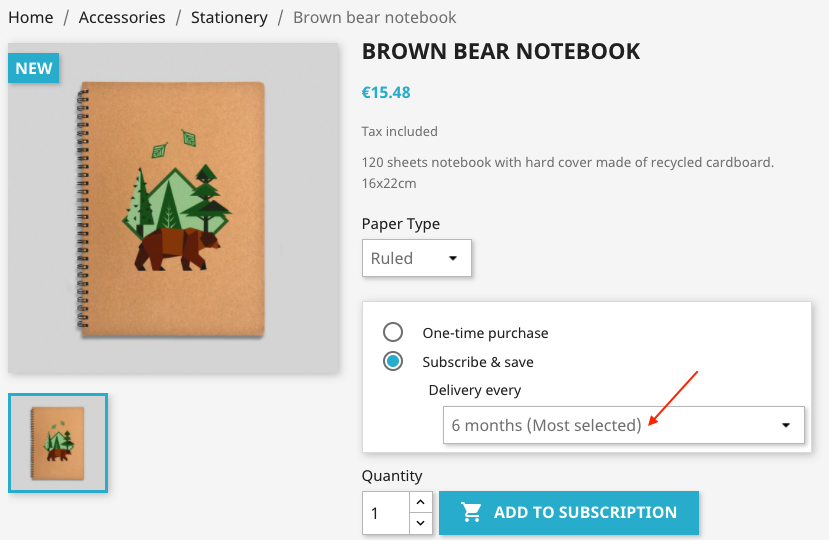
Note: if there is not yet subscriptions for the product, the frequency you have chosen as the “default” frequency for the product will be highlighted.
2. Tax Rate
Select the tax rate to apply for the calculation of the prices including VAT. You can use the tax rate defined for the product or use a specific rate, among those available in your store.

3. How the subscription details are displayed in the shopping cart
Choose how you want the details of the subscription added to the cart to be displayed through the “Subscription details display in the cart” option:

You can choose to display it in a window, after clicking on a link, or directly in the cart.
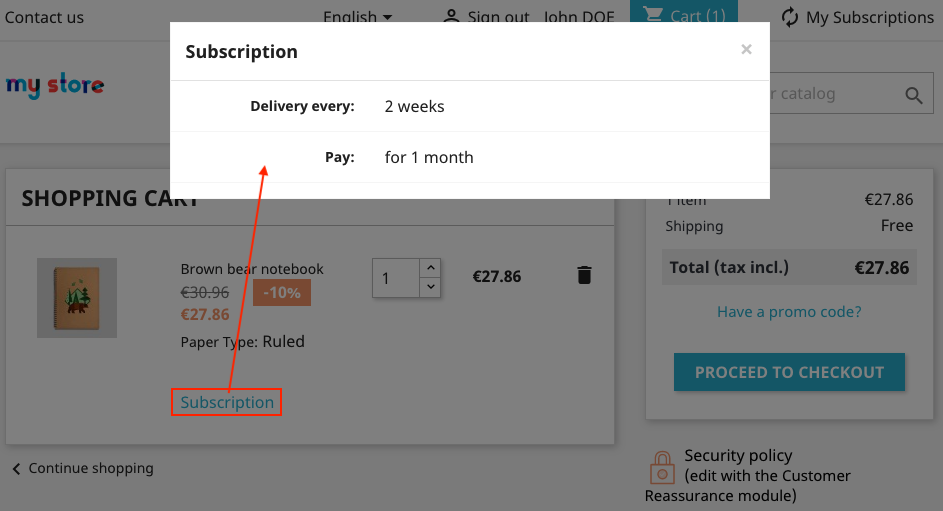
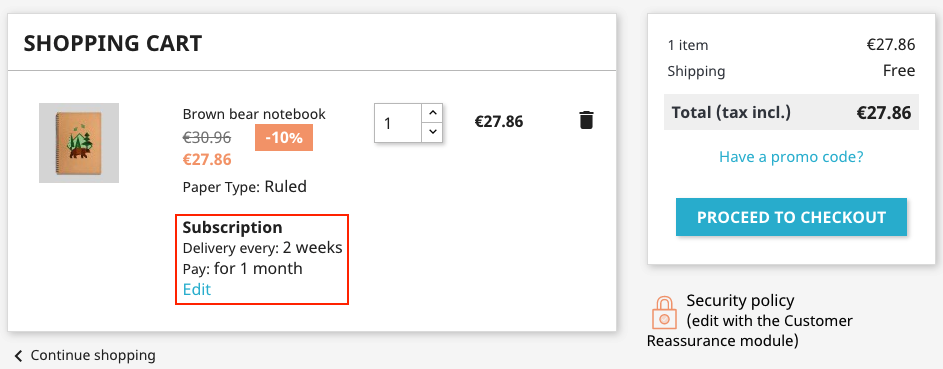
Example of a subscription with renewal every 2 weeks and pre-paid for 1 month:
- Display of the subscription details in a window:
- Display of the subscription details directly in shopping cart:
4. Display a “Save time” block
This option allows you to display a text encouraging your customers to subscribe to the product in order to save time. If you activate the option, this “Save time” block will be displayed on all product pages for which subscription is possible. You can define yourself the text to be displayed:
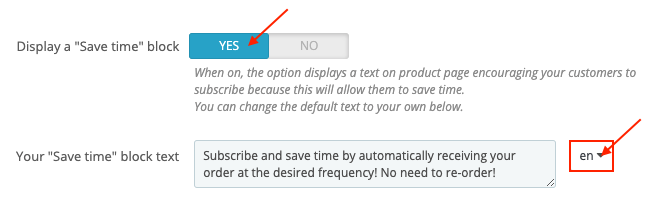
Do not forget to define a text for each language installed on your store.
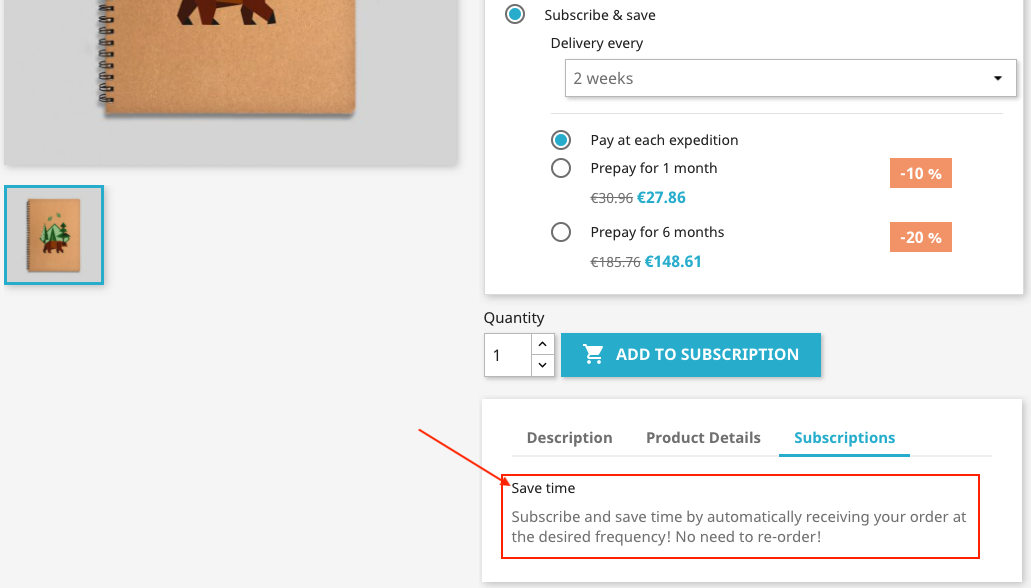
Example:
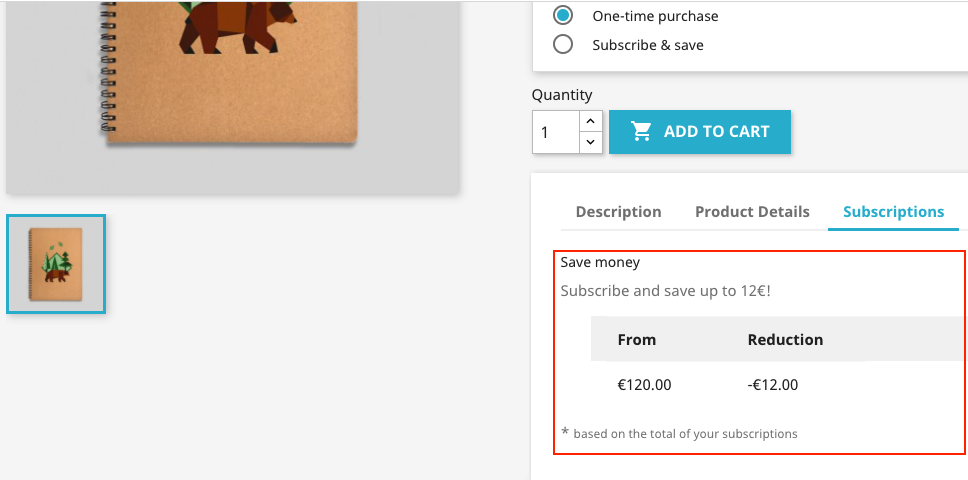
5. Display a “Save money” block
This option allows you to display a text encouraging your customers to subscribe to the product in order to save money.
Attention: If you enable the option, the “Save Money” block will only be displayed if you have allowed incentives for the product AND you have defined incentive rules. It will then be displayed on all pages of the relevant products.
You can define yourself the text to be displayed:
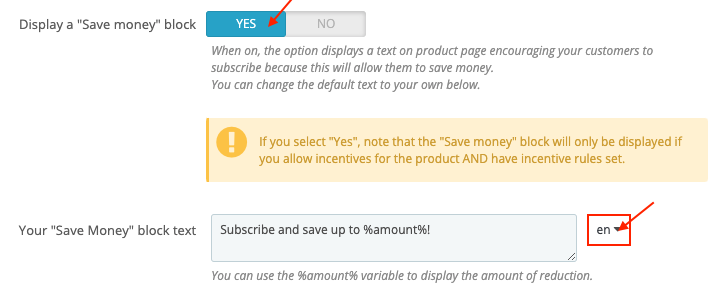
Use the string %amount% to display the discount your customer is eligible for (the string %amount% will be dynamically replaced by the module with the discount amount). Don’t forget to define a text for each language installed on your store.
Example:
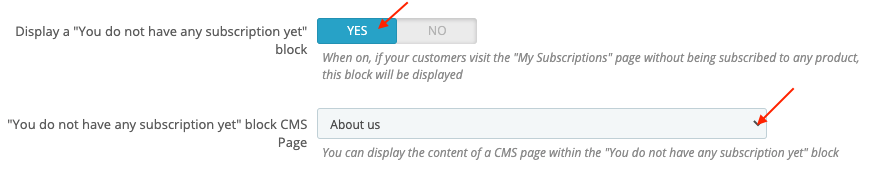
6. Display a “You do not have any subscription yet” block
This option allows you to display a “You do not have any subscription yet” block on the “My Subscriptions” page, when a customer without any subscription visits this page. You can also select a specific CMS page to display in this block.
Example of the display of the CMS page “About us”:
7. Display products as a grid or list
This option allows you to choose a grid or list view for the products linked to a subscription, within the “My Subscriptions” tab of the customer accounts. Enable the option for a grid view, disable it for a list view:
Here is what the display looks like in grid mode:
and the display in list mode:
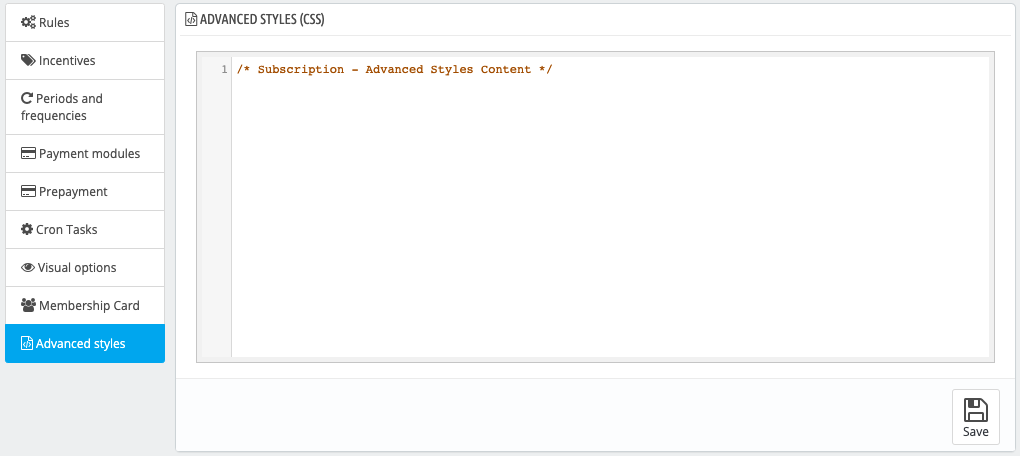
I/ Advanced styles (CSS)
The “Advanced Styles” tab allows you to add your own CSS rules to customize your displays.
How the new orders work for subscribers
Our module allows you to simplify the placing of new orders for your subscribers by eliminating the ordering tunnel, in the following cases:
- If your customer already has an active subscription and wants to subscribe to a new product, without making a pre-payment. In this case, after selecting his subscription frequency, he will see the “Add to subscription” button appear instead of the “Subscribe” button:
By clicking on it, the product is automatically added to the active subscription with the nearest renewal date. Your customer will only pay for this additional subscription at the next shipment.
If they want to change the renewal date of this new subscription, they can simply go to the “My Subscriptions” tab and click on the “Edit” button of the corresponding product, or they can move their product to another subscription with a simple click and drag!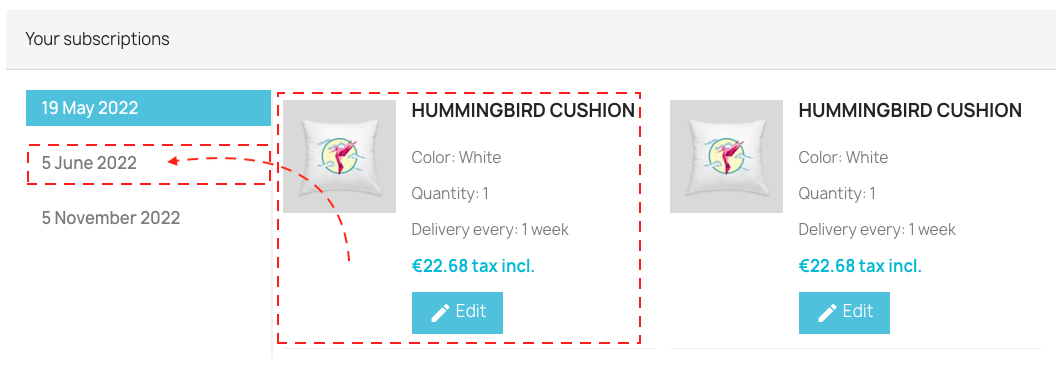
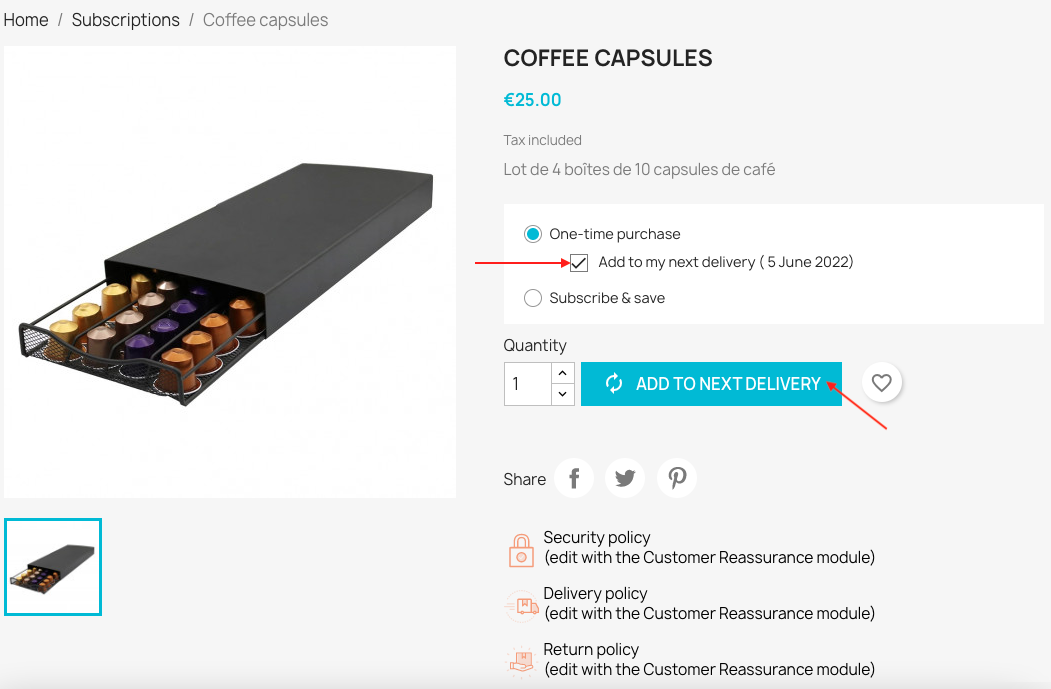
- If your customer already has an active subscription and would like to punctually purchase a new product and take advantage of the next subscription shipment to have it delivered. When they check the “One-time purchase” option and then the “Add to my next delivery” box, the “Add to next delivery” button appears instead of “Add to cart”. When he clicks on it, the product is automatically added to the next delivery of his subscription. The price of this product will be reflected in the amount of his next renewal.