Presentation
Advanced Background Changer has been designed to allow you to further customize the background for your PrestaShop shop. This module allows you to add custom background images, create slide shows and clickable areas and use them over your entire shop or on specific pages only. It supports multiple languages and an unlimited number of backgrounds.
General Points and Operating Principles
Advanced Background Changer supports an unlimited number of backgrounds that you can deactivate whenever you want.
The module has been designed to be easy to use for someone who is new to PrestaShop. If you have need the more advanced options, activate Professional Mode, available in all the tab panes.
The module provides you with the following two methods for inserting background images in professional mode:
– JavaScript, which allows slide shows to be created or full-screen display to be used. This doesn’t require any specific knowledge, but has few customization options.
– CSS3, which offers a very high level of customization thanks to more detailed settings and gives you the option to set your own CSS rules using the advanced styles field. This integration mode requires the user to have some web integration knowledge.
This module allows you to plan and set specific timers for backgrounds, thus allowing you to concentrate on your business whilst automating your commercial animations. During sales, for example, the backgrounds that you previously defined will activate and deactivate on the dates entered and the site will return to the initial background after that.
Advanced Background Changer allows you to differentiate between visitors and customers. You can thus show a specific background for your customers and another background for your visitors, which allows you to provide offers to your customers via a background, for example.
Finally, in order to improve the responsive design of your shop, the module automatically deactivates for any user viewing it from a smartphone, so as to avoid slowing down the load times for your site owing to the loading of large images that are not of any use for this type of device.
Installation
To install Advanced Background Changer, see our tutorial on how to install a module here
Maintenance Mode
This module has a maintenance mode. You can find the tutorial here
Configuration
You will need to be able to access its configuration panel to set the settings for the module. To this end, go to the back office of your shop and navigate to Modules. Look for Advanced Background Changer and click Configure.

You are now in the admin interface for the module. This is where you can set the parameters of the module to suit your needs.
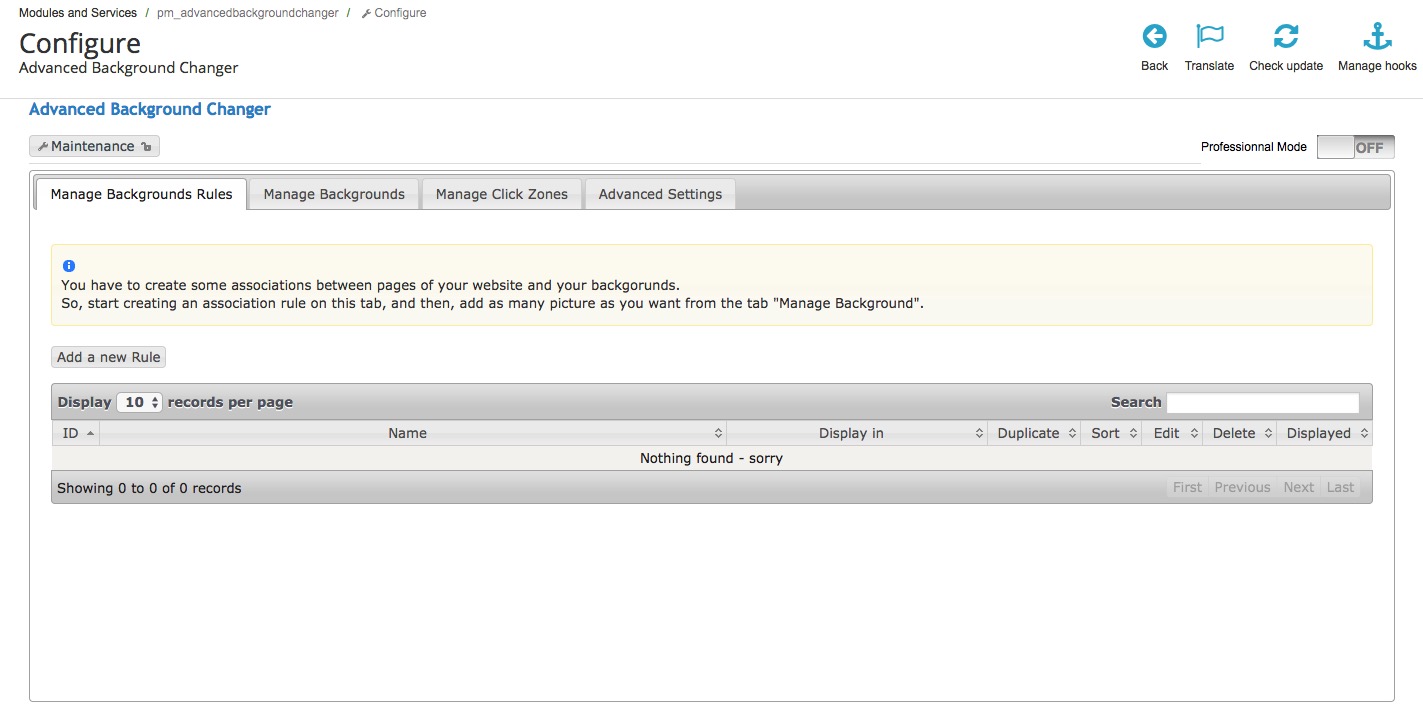
Manage Background Rules
This allows you to manage the rules for displaying the backgrounds. Each image will be associated with one or more rules. A rule defines the pages on which you want the backgrounds to appear, the period of time during which they will be displayed and/or the slide show options.
Create New Rule
Name of the rule
![]()
This allows you to name your new rule.
Apply everywhere
![]()
Select Yes to apply the rule being created to all the pages in your shop. This means the image(s) associated with this rule will be visible on all the pages in the shop.
Activation Period

This allows you to program the display period for your rule (and thus the image(s) that will be associated with it later on). The rule that was previously in force will be re-established when this period expires.
You can, for example, use this option to show a different background during sales.
Associations
Apply this rule to some categories
![]()
This allows you to apply the rule to all or some of the category pages.
NB: the product pages do not inherit this rule, even if the products belong to the category chosen.
Apply this rule to products into these categories
![]()
This allows you to apply the rule to all the products in the category selected.
You can, for example, use this option to show a background image of a watch for all the products in the Watches category.
Apply this rule to some products
![]()
This allows you to apply the rule to all or some of the Product pages.
Apply this rule to some manufacturers
![]()
This allows you to apply the rule to all or some of the Manufacturer pages.
You can, for example, use this option to show a special offer image on a manufacturer page
Apply this rule to some suppliers
![]()
This allows you to apply the rule to all or some of the Supplier pages.
Apply this rule to some CMS pages
![]()
This allows you to apply the rule to all or some of the CMS pages.
Apply this rule to some special pages
![]()
This allows you to apply the rule to the pages that have not been listed above.
You can, for example, use this option to show a special image on your 404 page.
Background Options (professional mode only)
Background Color
![]()
This allows you to choose the color displayed behind the image.
This allows you to choose the color displayed behind the image. To do this, create a rule and set this option to the desired color and do not apply any image to the rule created.
Delay of display
![]()
This allows you to set the time for which each background image will be displayed. You must enter a value in milliseconds (5000 milliseconds = 5 seconds).
This only concerns rules for which several images have been assigned (therefore creating a slide show). JavaScript backgrounds with a single image and CSS backgrounds are not affected by this setting.
Texture to apply over background
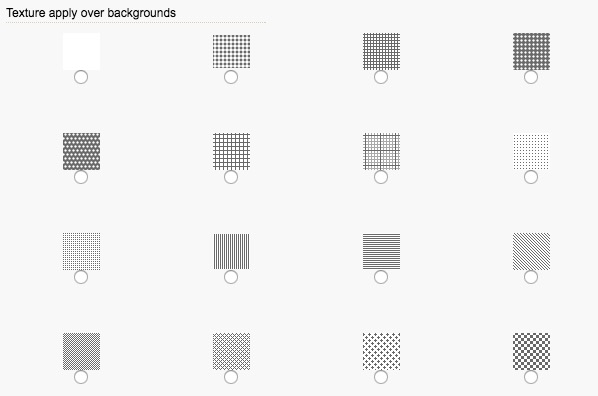
You can choose to apply a pattern to your background images. The image will not be altered, rather the module superimposes the pattern over the background images.
Restrictions (professional mode only)
Users concerned by this rule
![]()
This allows you to restrict the rule to a single group of users (and therefore restrict the image that you assign to same).
You can, for example, show an offer-related background to your customers only and not to your visitors.
Image Sort
![]()
This allows you to set the display order for the images associated with the rule. When you assign several images to one rule, an order is applied, whatever type of background is used. To edit this order, just click and drag the background to the order position you want, whilst the mouse is on the arrow.
The order set here sets the display order of the images in the slide show for a JavaScript background. So the first image on this list will be the first one to appear and then the second one and so on.
The order set here sets the depth order of the images for a CSS background. So the last image on this list will be at the bottom and the others will be displayed over this one, as per the order defined.
NB. the images have to be assigned to the rule before their order can be modified.
Manage Background
Add a background
This returns a list of rules that you created previously. This is where you can assign an image to them.
Only professional mode allows you to name your images. They shall be named automatically by the module for this example. This name will only be visible in your back office and not on the page on your shop.
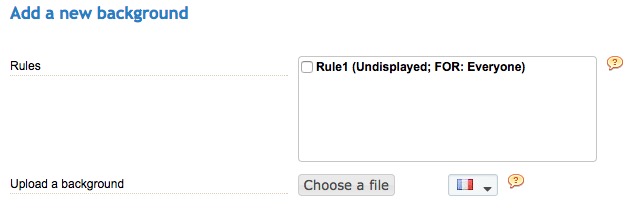
Rules

This allows you to select one or several rules to which you want to assign the image that you are going to add.
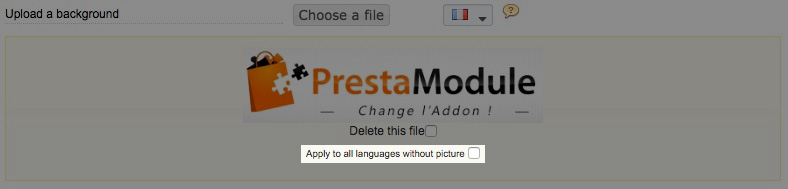
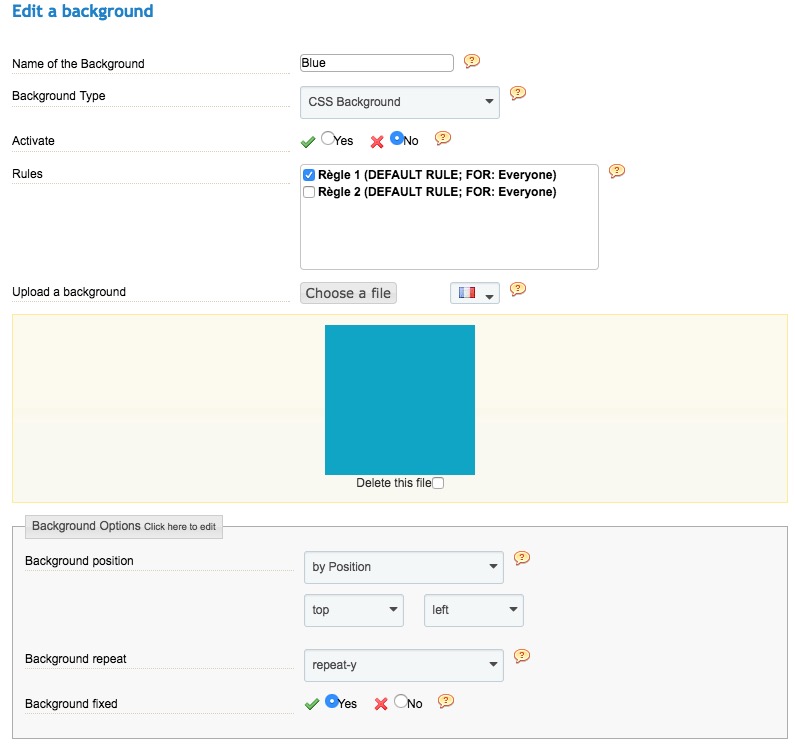
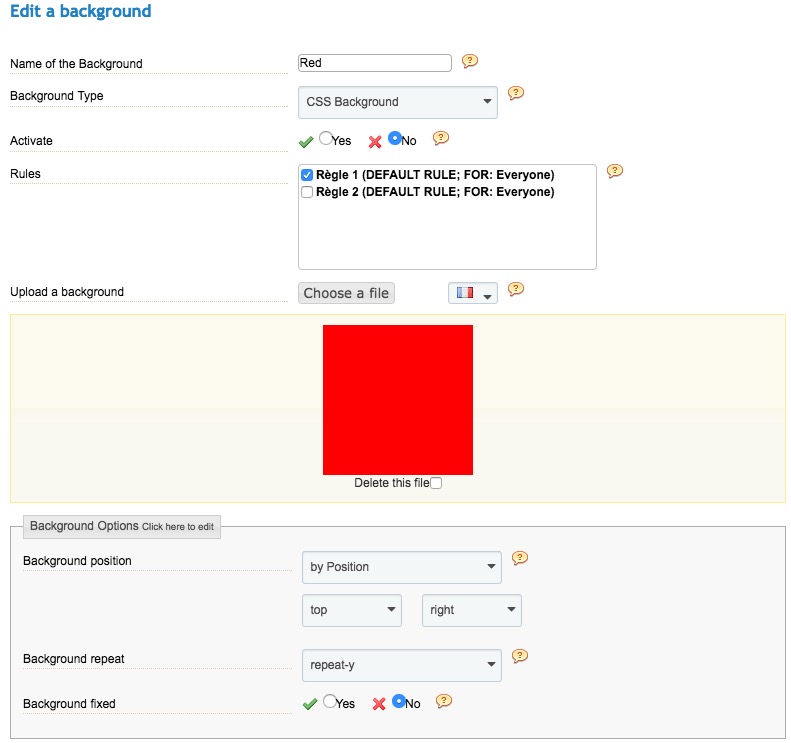
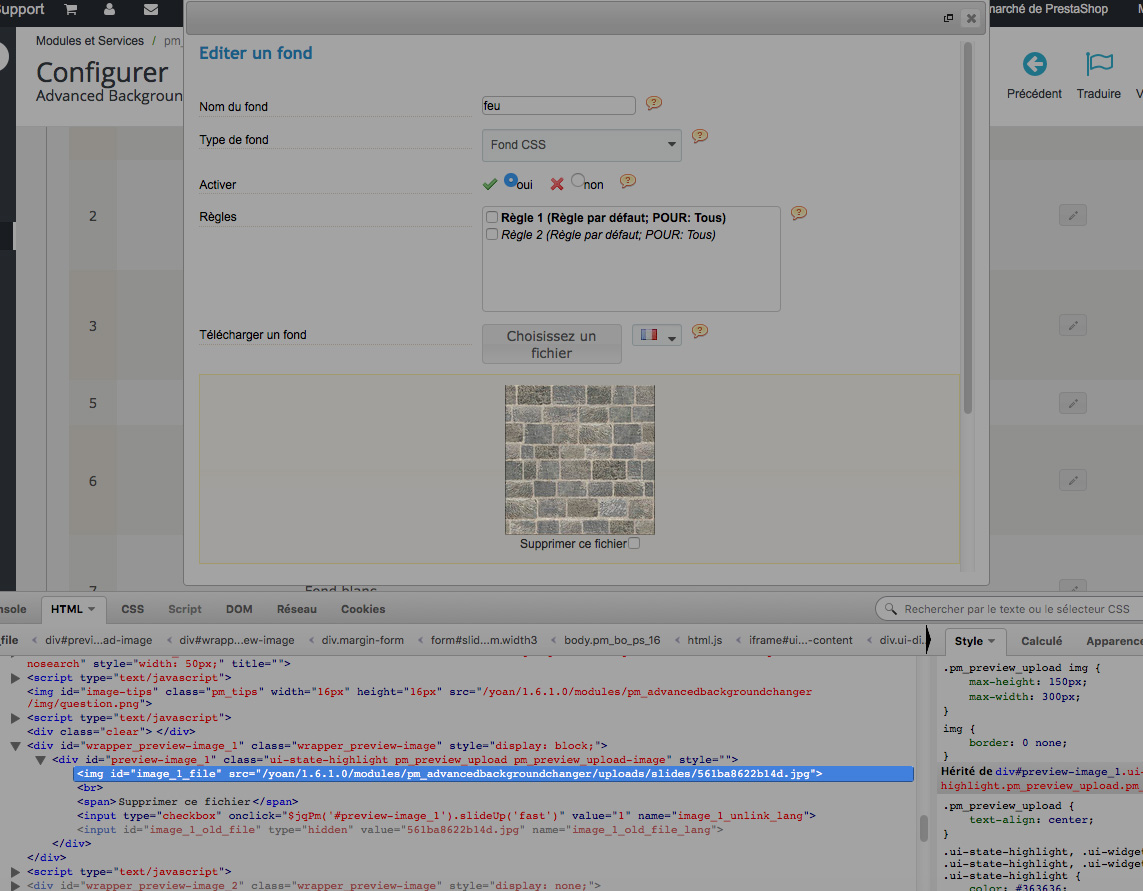
Upload a Background
![]()
This allows you to send an image you choose on your computer to your shop. You can set one title for each language that you have installed on your PrestaShop shop.
Once you have selected the file, a preview will appear in order to allow you to check the image. If you are happy you can continue with the procedure. If, however, you want to delete the image tick Delete this File below the preview.
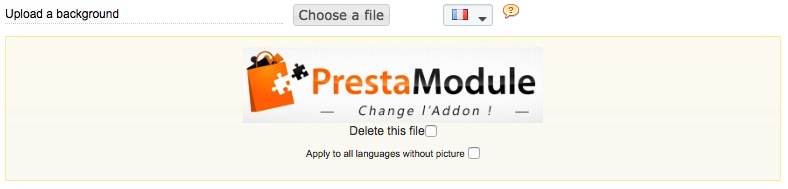
NB: If you have several languages installed on your shop, you will need to add one image per language. To do this you have a drop-down list that allows you to choose from among the languages available. To apply the image that you are currently adding to all the languages for your shop, click Apply to All Languages that don’t have any Images, under the preview.
Name of the background (professional mode only)
![]()
This field allows you to name the image that you are adding.
Background type (professional mode only)
![]()
This allows you to set the type of background that you want to create. You can create one of the following:
– A JavaScript background (default option in Normal mode), which is a single, full-screen image. You therefore need to associate several backgrounds to one rule to create a slide show.
– A CSS background is a more customizable background, that allows several images to be both displayed at the same time and accurately positioned.
Activate (professional mode only)
![]()
This will activate the background that you are creating once it has been saved. This option is automatically set to Yes in normal mode.
Background Options (professional mode only)
Keep original background size (JavaScript background only)
![]()
This allows you to set the alternate size of the image to be added. If you select No, the background will be displayed in full screen automatically. If you select Yes, the image that you add will retain its original size.
We do not advise that you add an image with a specific size and apply it to your site in JavaScript mode. It will be distorted if the screen size changes (e.g. on a smartphone).
Horizontal Alignment (JavaScript background only)
![]()
This allows you to set the horizontal alignment, in percentage, for the image you are adding.
Vertical Alignment (JavaScript background only)
![]()
This allows you to set the vertical alignment, in percentage, for the image you are adding.
Time of Fade transition (JavaScript background only)
![]()
This allows you to set the fade transition animation time, in milliseconds.
This is set to 2000 milliseconds, which corresponds to 2 seconds, by default.
Background Position (CSS background only)
![]()
This allows you to position your background image very accurately, for both small and large images. You have access to 4 configuration methods via the drop-down list:
– By Position: allows you to select from the pre-defined horizontal and vertical positions (top left, bottom right, center left, etc.)

– By Percentage: allows you to set a horizontal and vertical percentage for the position of the image.

– By Pixels: allows you to enter a number of horizontal and vertical pixels for the exact position of the background.
![]()
– Custom CSS (advanced user): allows you to enter custom values for the Background-Position CSS tag. Enter your the in the following order to do this: horizontal value, vertical value.

This allows you to combine the key word hooks (center top etc.) and pixels, as in the example below.
Examples:
The dimming effect on our images is only there to highlight the result. The module will not apply any effect to your background.


Background Repeat (CSS background only)
![]()
This allows you to create a repeating background. There are 4 options:
no repeat, repeat-x, repeat-y and repeat
– No repeat allows you to not repeat your background.
– Repeat allows you to repeat the background vertically and horizontally.
– Repeat-x allows you to repeat the background horizontally.
– Repeat-y allows you to repeat the background vertically.
Examples:

Background Fixed

This allows you to attach the background to the page. If you activate this option, the background will not move when the user scrolls the page. However, if you select No, the background will move when the user scrolls the page.
If you want the background image you added to show a special offer, for example, it might be more advantageous to have the background move when the page is scrolled, so that your customers always see it.
Activation Period

This allows you to set an activation period for the background. You can thus schedule when it is to be displayed by setting a start date and end date (Year/Month/Day Hours:Minutes:Seconds).
Enter the same date and time in the start and end fields to activate the background indefinitely.
We recommend that you use this feature to show a special offer background or sale background, for example. You can use this to define the display period for the dates that you have set.
Manage Click Zones
Add a click zone
Title appearing when the cursor is over the zone
![]()
This allows you to set the title for the clickable area. This will be displayed if your customer passes their mouse over the clickable area (this field corresponds to the image title tag).
Link
![]()
This allows you to set the visibility of the clickable area. You can enter a link to either a page on your site or to an external page. You need to enter a full, valid URL.
Example: http://google.fr
NB: not entering the http before the URL will not create the desired link. In this example, this would cause google.fr to be added to the end of the URL for your shop i.e. yourshop.com/google.fr. You must enter “http://” in front of the link for it to work properly and solve this problem.
Activate
![]()
This allows you to activate or deactivate the clickable area that you are creating You can edit this parameter later.
Select a background to associate the zone with

This list gives you all the backgrounds that are compatible with the clickable area function.
Tick one or several boxes to associate the backgrounds with the clickable area. These will then become operational immediately.
Display Options
Zone fixed
![]()
This allows you to set the scrolling of the clickable area. If you select YES, your area will not move if your customer scrolls down the page. If you select NO, your clickable area move with the page.
Border for development
![]()
This allows you to highlight the clickable area, by adding a color border.
We recommend that you use this option only when you are developing your shop, since the border is not appropriate for commercial display.
Border Color
![]()
This allows you to set the border color for the development border defined above.
If the development border is deactivated, the color set here will not be displayed
Width
![]()
This allows you to set the width of the clickable area. You can choose one of two units of measurement – pixels or percentage.
The origin point for the calculation for an area in pixels, is the top left corner of your page. However, this point may be edited by the following options or by your theme
Height
![]()
This allows you to set the height of the clickable area. You can choose one of two units of measurement – pixels or percentage.
The origin point for the calculation for an area in pixels, is the top left corner of your page. However, this point may be edited by the following options or by your theme
Left Margin
![]()
This allows you to insert a margin to the left of the clickable area (horizontal margin). You can thus position the clickable area wherever you want it horizontally.
Combine this parameter with Margin-Top in order to allow you to position your area where you want it on the page
Top Margin
![]()
This allows you to insert a margin above the clickable area (horizontal margin). You can thus position the clickable area wherever you want it vertically.
Combine this parameter with Margin-Left in order to allow you to position your area where you want it on the page
Advanced Settings
Edit CSS Styles

This allows you to add custom CSS code to the module parameters, providing a high level of customization. For this method, however, you need to know CSS.
Do not edit the options present in this text area if you do not have any CSS knowledge
Advanced Settings (professional mode only)
CSS Selector where to apply background
![]()
This allows you to set the tags to which your CSS backgrounds will be applied (so does not concern JavaScript backgrounds).
CSS Selector for hiding backgrounds
![]()
This allows you to set the tags for which you want to hide the backgrounds applied by your theme, in order to use those inserted by our module.
Z-Index Value for click zones
![]()
This allows you to set the z-index for the clickable areas. The z-index is a value associated with the depth of an element. The element with the highest z-index will appear above the others, and so on in decreasing order.
If you cannot see the clickable areas, it is possible that your theme modifies the z-index of some of the elements on your shop.
If this applies to you, see the next section on how to modify your theme.
If you cannot analyse your page, enter a very high value so that it is higher than all the other elements (e.g. 5555), since most of the elements have a z-index of around 1.
You should be aware that the default PrestaShop theme has a z-index of 5003 for the header element, which may cause you problems.
Adapt your Theme
The use of Advanced Background Changer may create conflicts with your existing theme. It is possible that some elements may disappear once a new background is applied.
This section provides a guide to help you to solve the conflicts that are the most commonly encountered.
The terms used are explained below:
– HTML Code: HTML is a web language that allows data to be displayed and formatted using content tags.
– CSS Code: CSS is a style language that allows the HTML code to be formatted.
– Z-index: z-index is a CSS attribute that sets the depth of an element. The element with the highest z-index will appear above the others, and so on as the z-index decreases.
– Tag: a tag contains the content that the page is to display. It is placed between angle brackets, < and >, and may comprise attributes such as class or href, for example.
– Class: A class is the name given to all the CSS attributes that can be assigned to a element in its tag. They are defined in the CSS files.
Installing the Tools
You need to have the tools in place in order to be able to find the conflicts. This is not hard. You simply need to download two programs:
– The first is the Mozilla Firefox browser (unless you are already using it): it is free and available for Windows and Mac. It can be downloaded here: Download Firefox
– The second is a Firefox add-on called Firebug. Firebug can be installed in Firefox and adds very efficient development tools. It can be found here: Download Firebug
To install Firefox, open the executable file you downloaded above and follow the instructions.
Once the installation is complete, open Firefox and go to the Firebug page (above). Click Add to Firefox. This downloads the add-on.
Click Install when the download has finished.
Now you have the tools you need to remedy the conflicts.
Searching for Conflicts
You can start your search now that you have the tools you need.
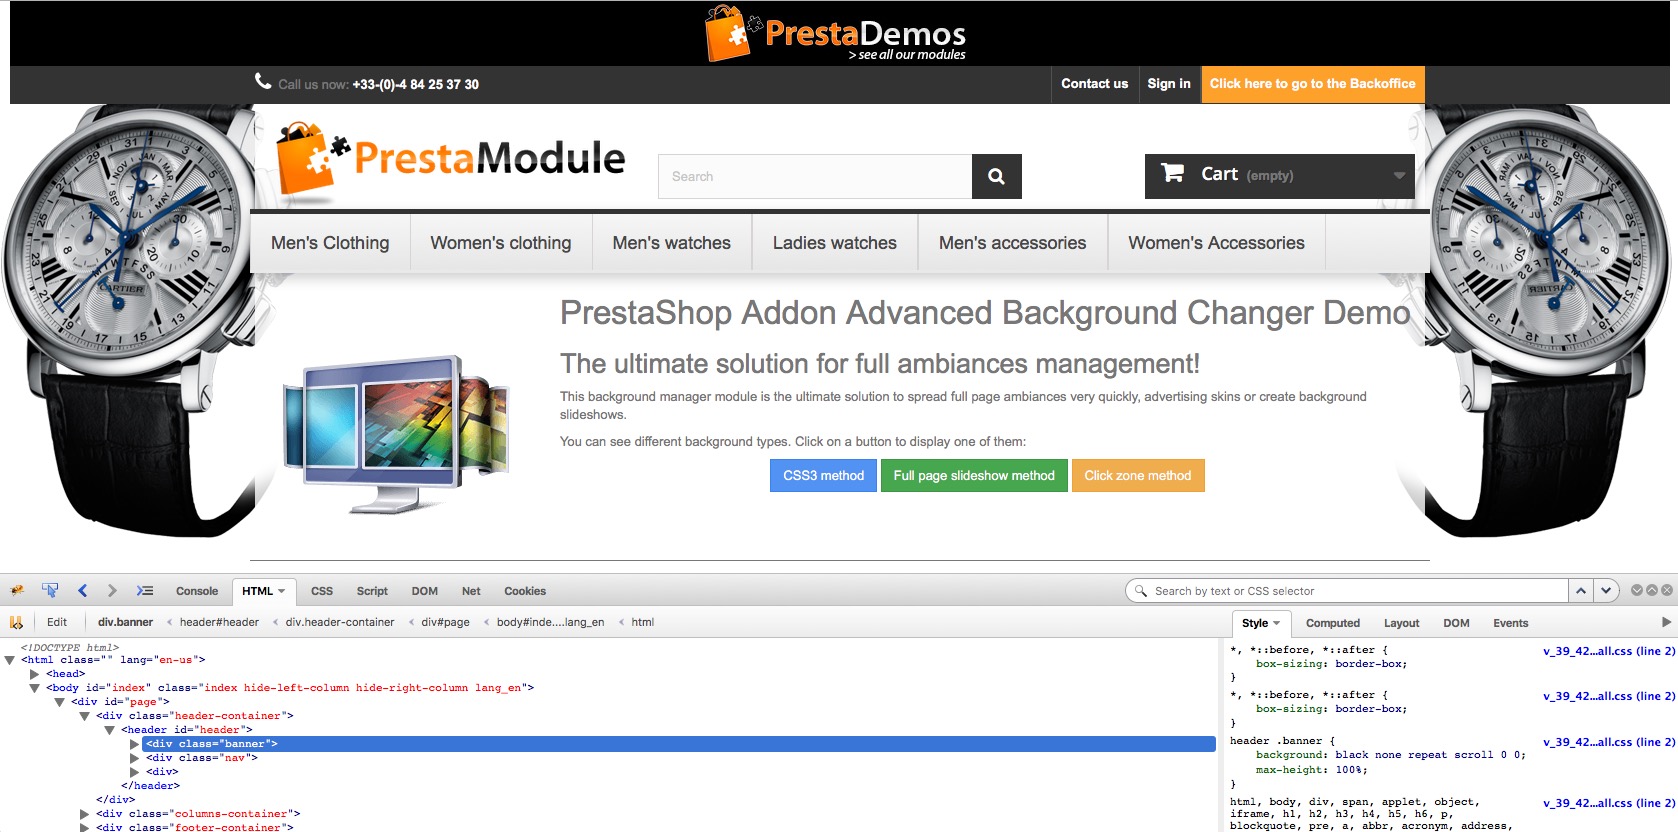
If you right-click a website, you now have an Inspect Element with Firebug option. Select this. This window then appears at the bottom of your browser:
We are going to use the following tools:
– Click an element that is on the page that you want to inspect: this will allow you to inspect the source code for an element by simply clicking on it.
![]()
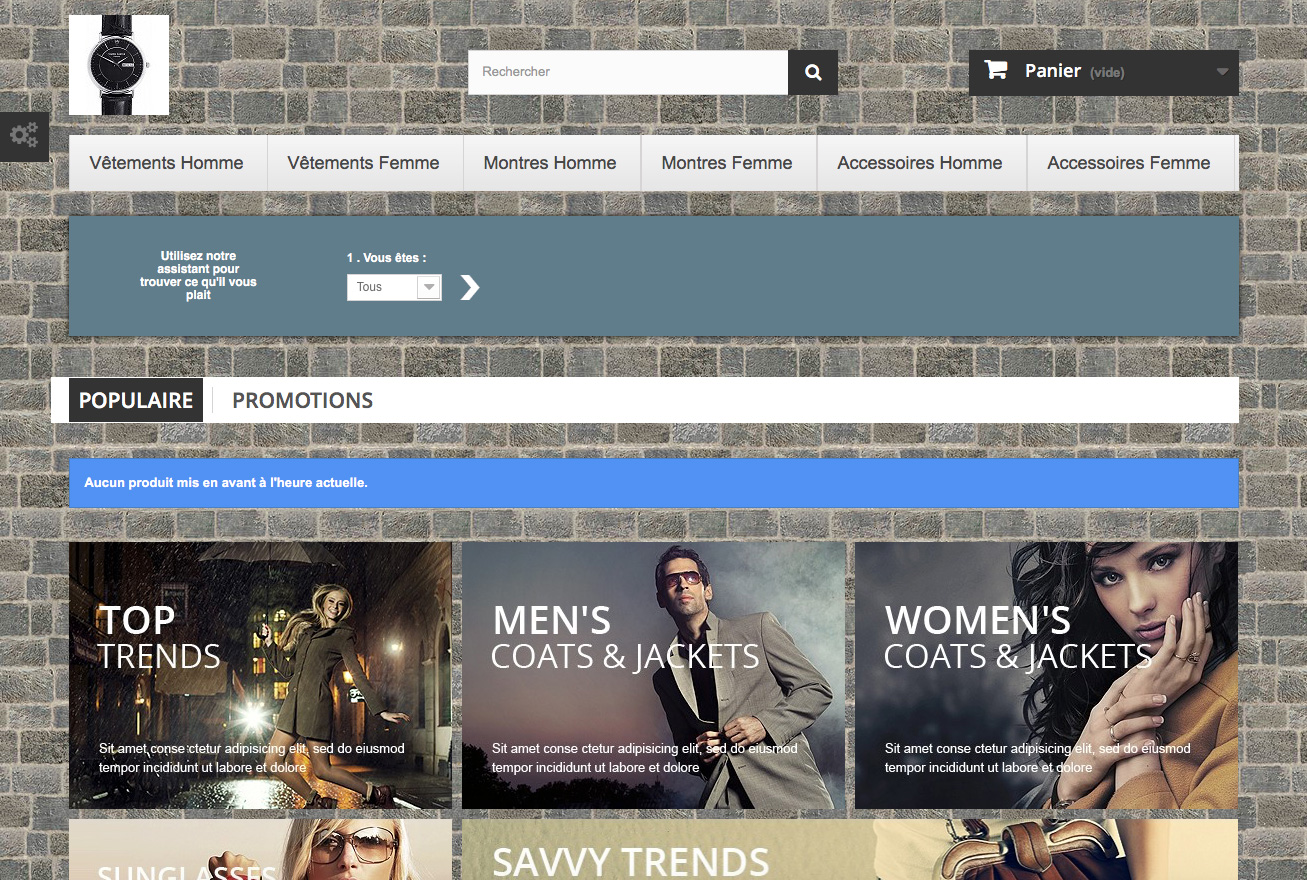
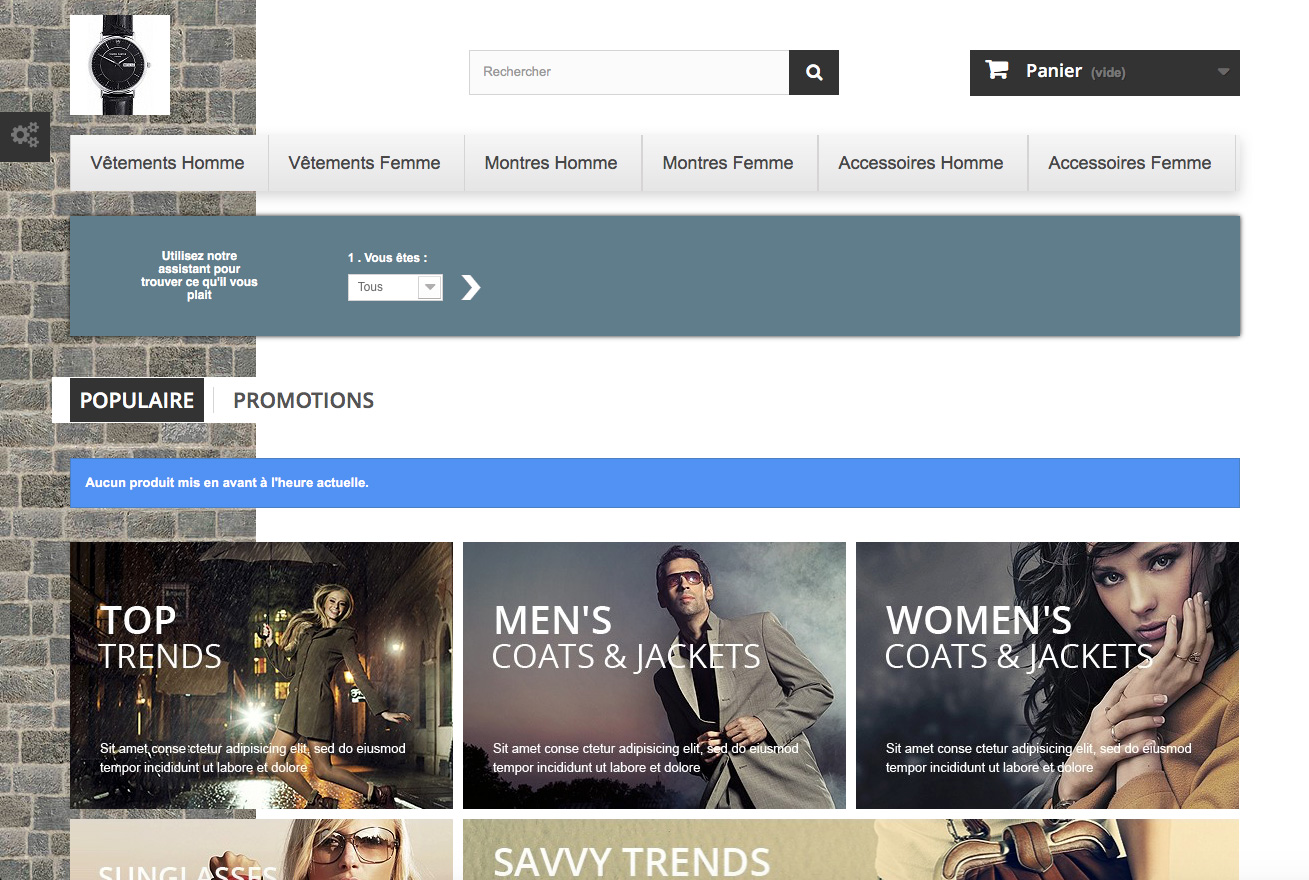
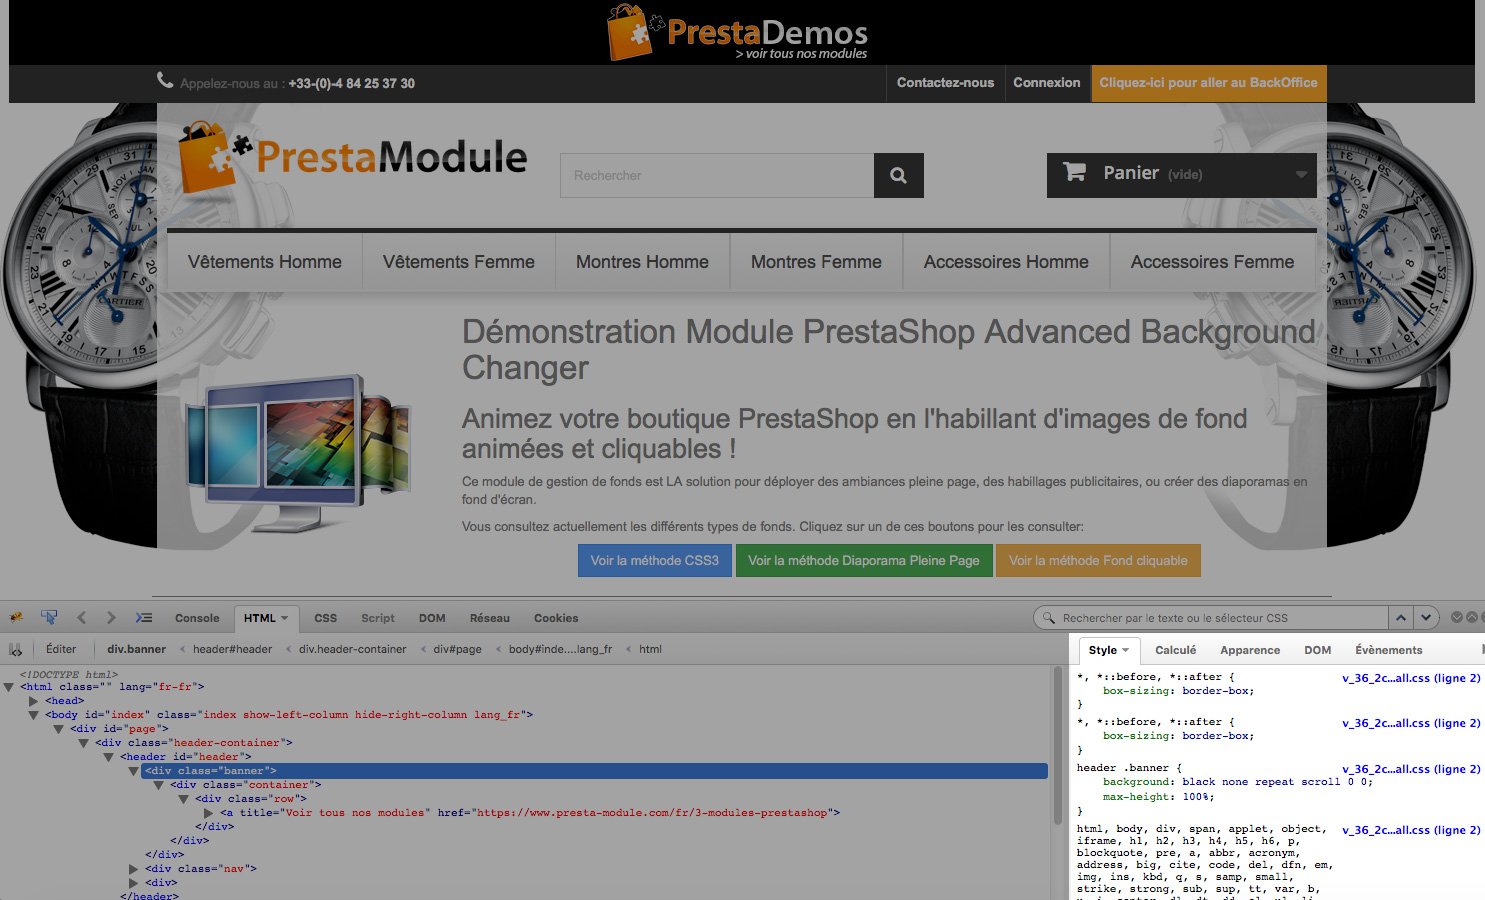
For example, if you go to the Advanced Background Changer demo page and you want to inspect the background, you can use this function and click on the background for the page.
– HTML Tab Pane: this shows all the HTML code for the page being viewed. If you inspect an element using the above option, the code for the element is highlighted in blue in the HTML tab pane.
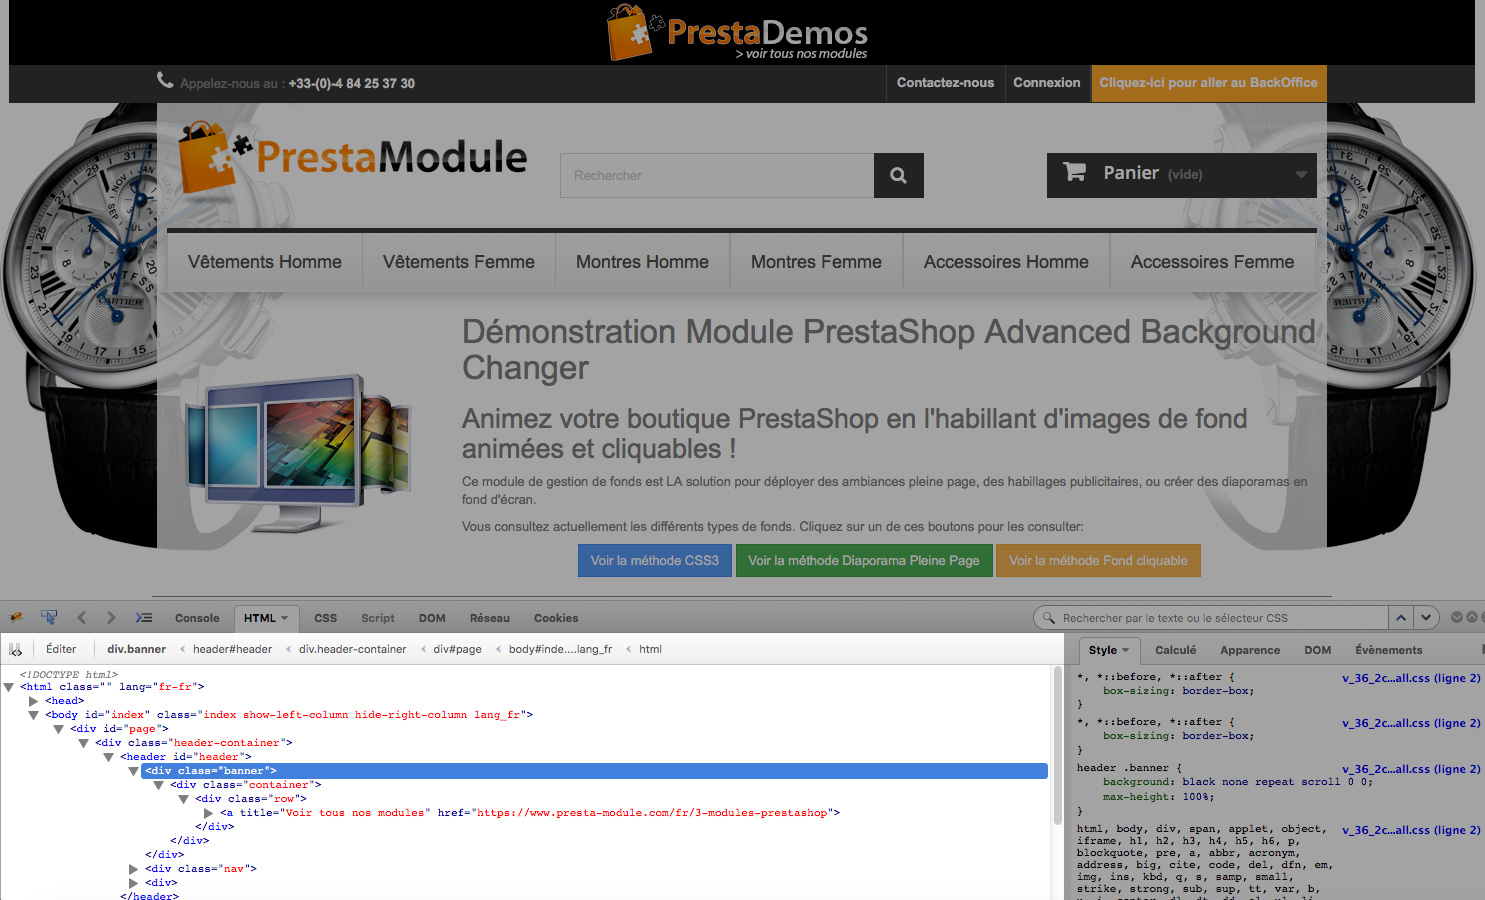
– Style Tab Pane: this shows the CSS code for the page. This is the section you will use to detect any style conflicts between Advanced Background Changer and your theme.
Common Problems
Solutions to the problems that are frequently encountered with the module are given below.
Clickable Areas not Visible
If you create clickable areas and you cannot see them, even though you have the right settings, it is possible that there is a conflict between the module and your theme. The z-index is often the problem.
To check this, we are going to use the Firebug inspector previously installed. Start by activating the development border in the parameters for the clickable area. Go to the page where your area should be visible and inspect the area. It has been set to the left-hand side of the entire page in this example.
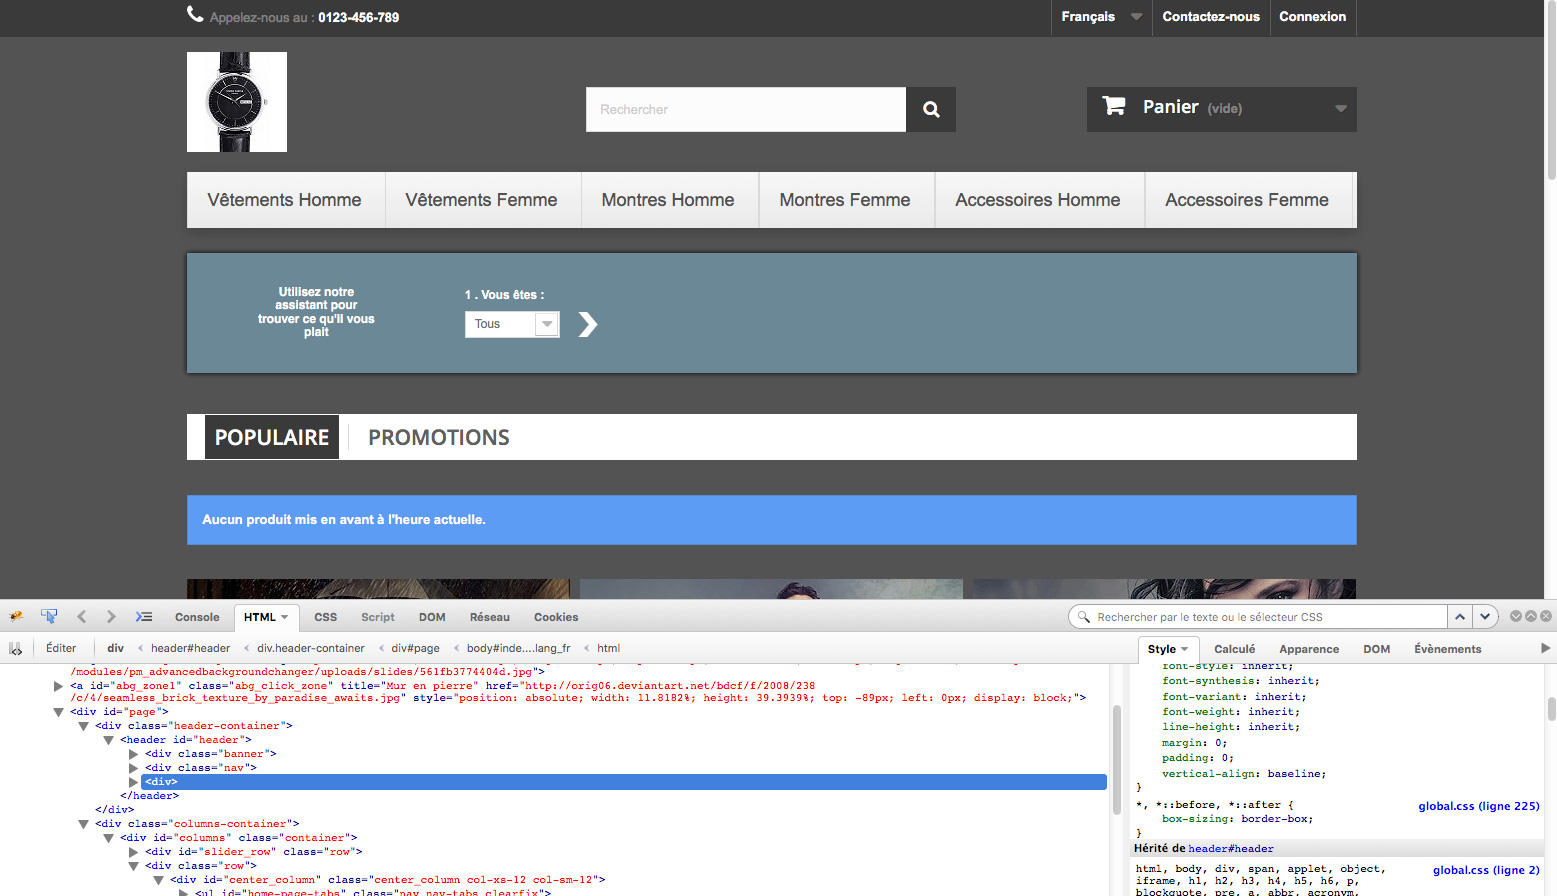
Inspection of this section shows the code for the page but does not detect the clickable area. If we scroll up the code a little way, a <a> tag (which creates a link) is given with class .abg_click_zone and the title given in the parameters (“Stone Wall” in this example). It also comprises the link previously entered in the back office. We can therefore conclude that this is the clickable area that we can’t see. Clicking this tag will show the associated CSS code in the right-hand column and shade the block on the page.
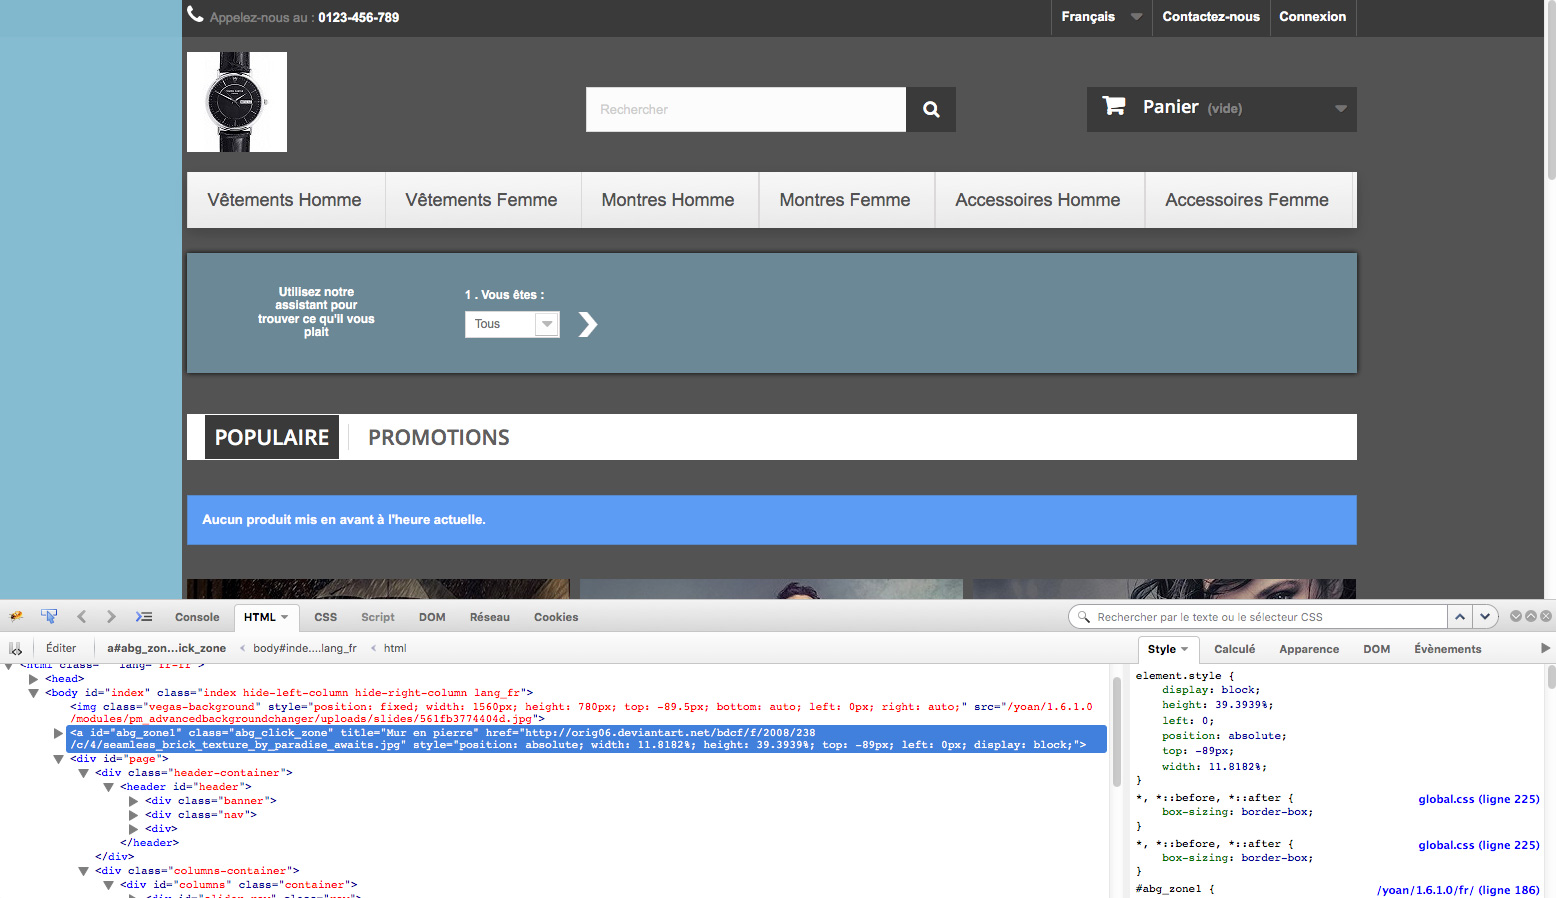
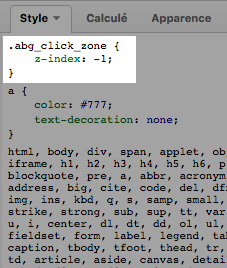
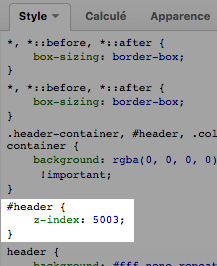
This is where the conflict search work starts. If the area does not appear even though the code is present, then it must have been covered by another element (that has a higher z-index value). We are therefore going to look for the z-index value for our area. Scroll through the styles until you find the z-index. It is set to -1 here, which should have it show on the top. There must, however, be an element with a higher value nearby.
The clickable area shown here does not have any margin above it or to the left. Its origin is therefore the top left corner of the page. This is where we are going to inspect and search for the problematic element. The inspector here shows that we have selected the <body> block and that the next block is the <header> (if the cursor is placed on the <header> tag in the HTML code, Firefox shows us its position using colors). So let’s check the z-index for this block. Click the <header> tag and navigate to the right-hand column.

In this example, when we scroll through the CSS code, we can see that the z-index value for the <header> block has been set to 5003. This therefore explains the disappearance of the clickable area – the <header> block has been placed on a layer that is 5002 layers above it. Now that we have identified the conflict, we will need to modify the z-index for our area to get it to appear.
To do this, navigate to the parameters for the Advanced Background Changer module and activate Professional Mode. Next, click Advanced Settings. This gives you a Z-Index Value for Clickable Areas option: This is exactly what we want to change. In our example, the block that hides the click zone has a z-index of 5003. That means we are going to set a higher value (5004 is enough in this case). Click Save after you have entered the value. Reload the page and the click zone is now working properly.
The value that you enter for this parameter will be applied to all your click zones

Make the changes then deactivate the development border and the area is now fully operational.
The search approach is the same for all themes
Do not apply the background to the center of the page
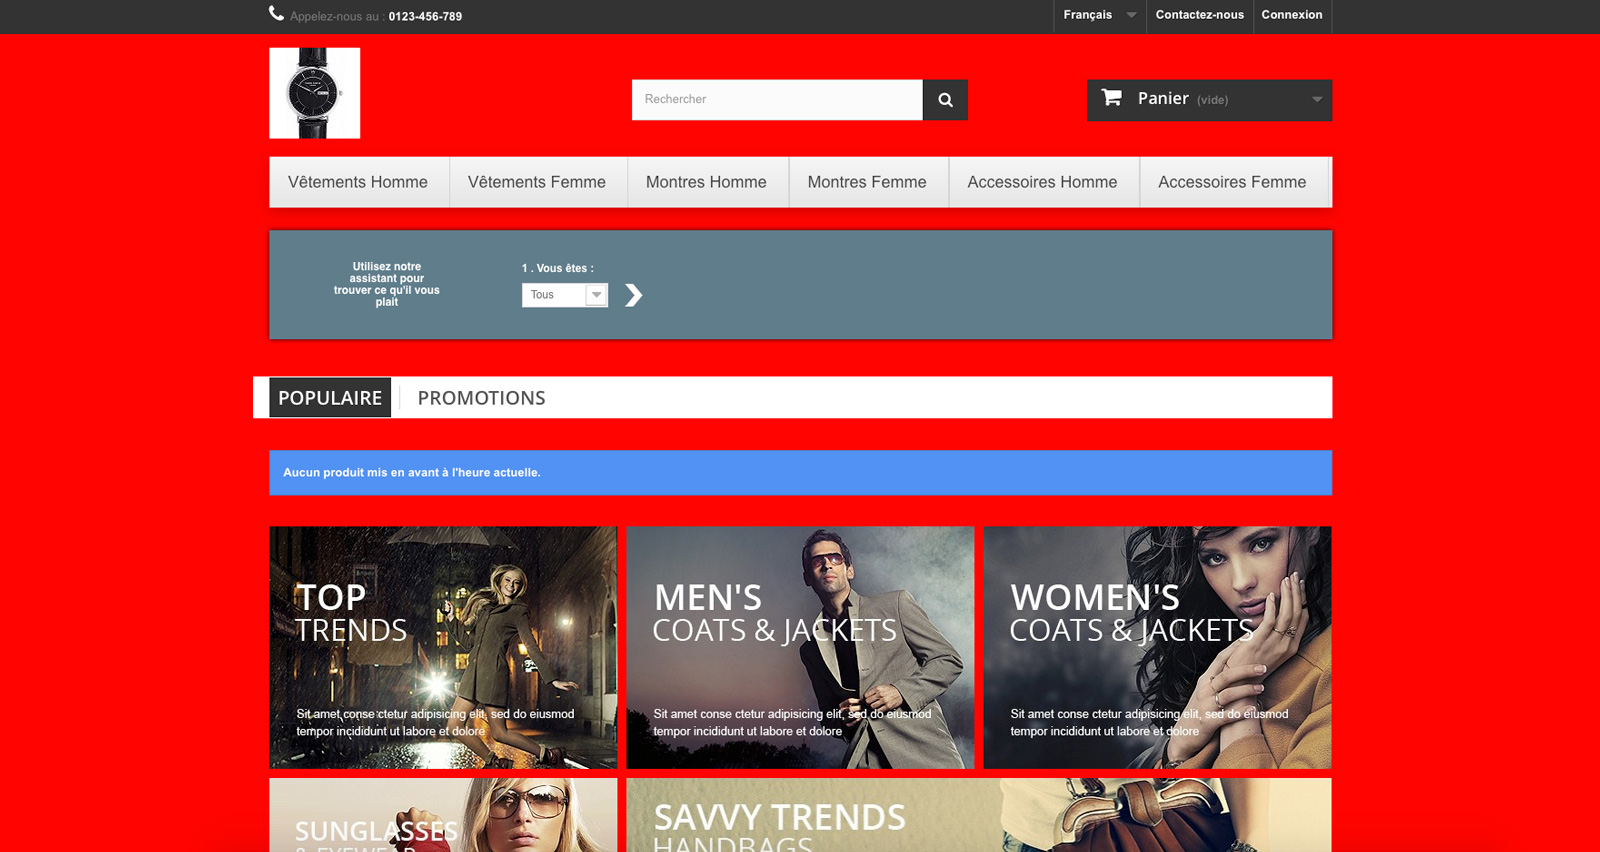
When you set a background for your shop, the centre of your page will show this background and the other elements will be placed over it, providing a result that is sometimes not very attractive.
To remedy this, you will need to edit the Advanced Styles for the module and indicate that you do not want the background color in the middle of the page. To do this, navigate to Advanced Styles under the parameters for Advanced Background Changer.

You must uncomment a section of pre-entered code depending on the PrestaShop version used for your shop (this code is inactive when commented out). This version number is given in the top left of your back office. Once identified, scroll the Advanced Styles area until you find your version (only the first 2 figures of your PrestaShop version are used for these settings. i.e. use the PrestaShop 1.6 section for a 1.6.1.0 shop).
Delete the comment tags for the required code to uncomment it. These tags are as follows:
– “/*” to start a comment
– “*/” to end a comment
You do, however, need to delete the right tags. The ones to be deleted for each version are shown on the following screenshots:


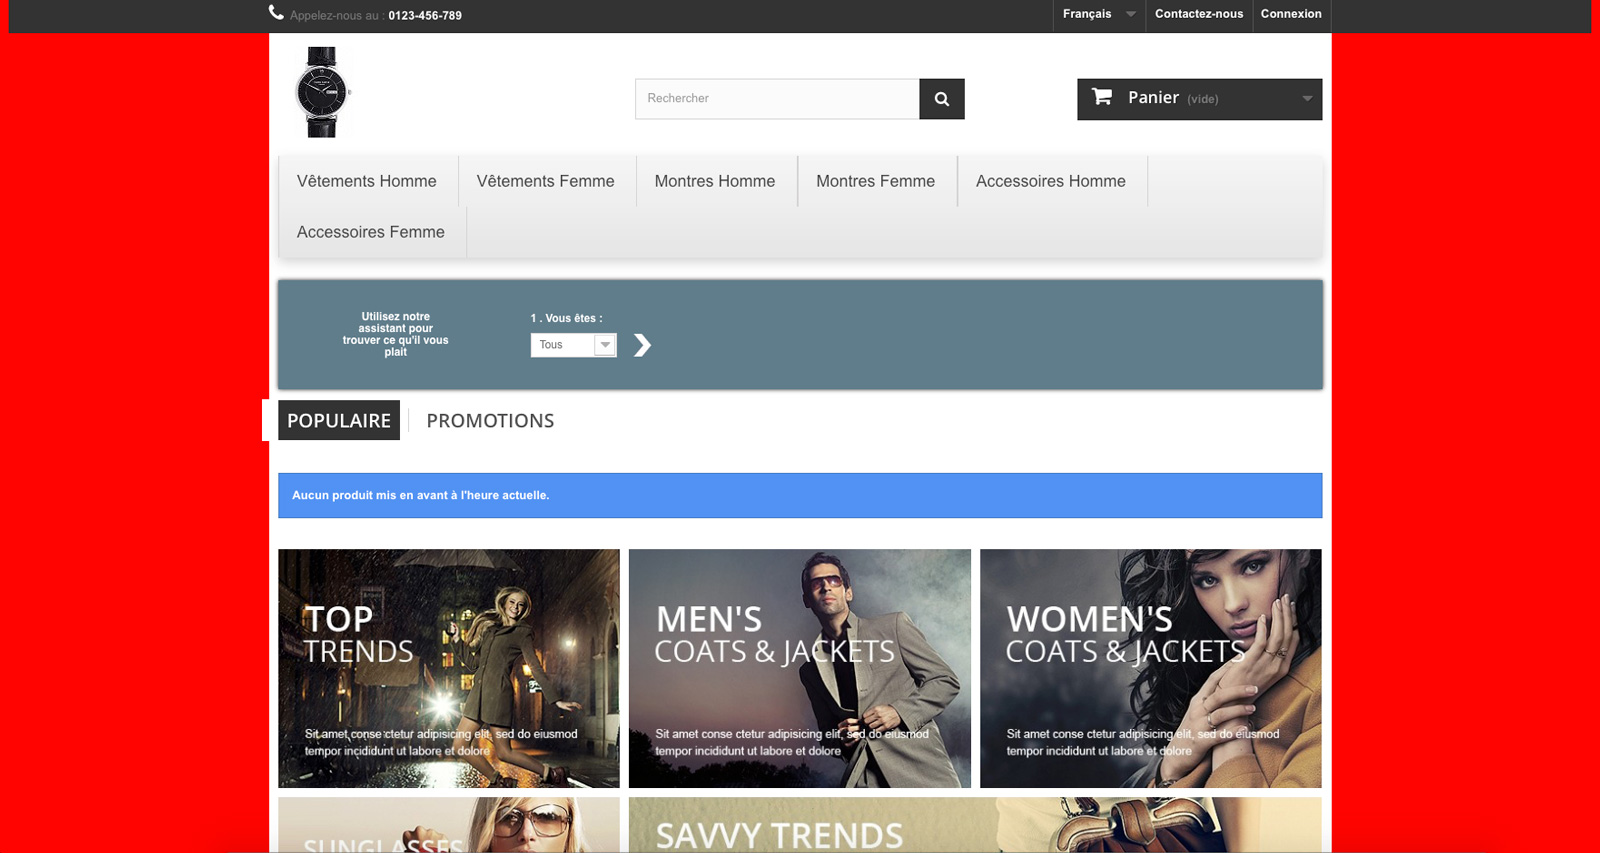
Once the comment tags have been deleted, click Save and refresh the page for your shop. Your background is now no longer applied to the central section of your shop, for all the pages in your shop.
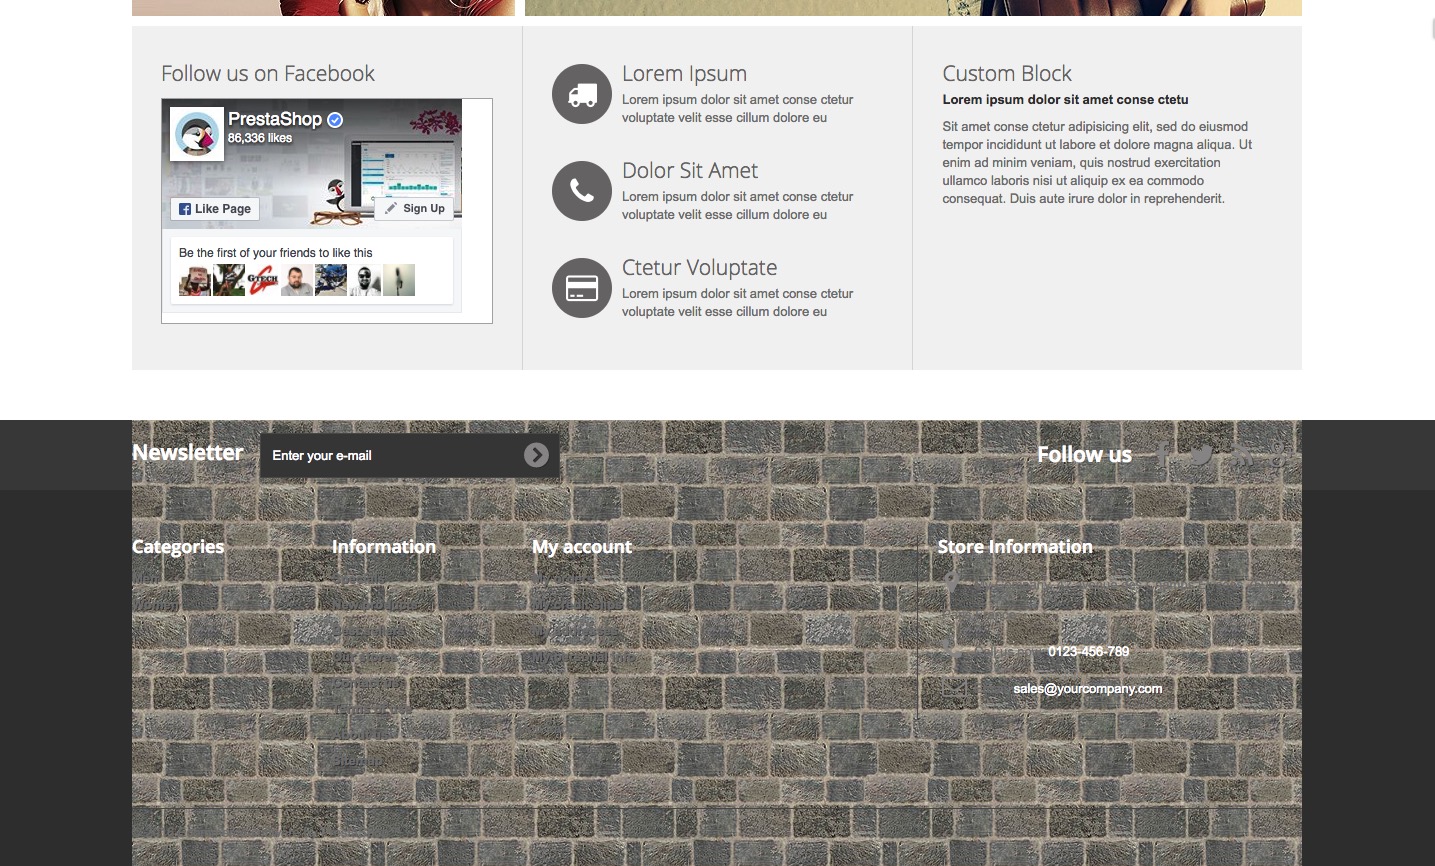
Show an Image on Each Side of a Page
Creating an image with specific dimensions for your background to show only 2 columns, to the left and to the right of your page, is not the correct way to achieve this result. If the size of the window changes, your background would not look like you want it to.
The correct way to achieve this result is to create two CSS backgrounds and place them in the left-hand and right-hand columns. This keeps your backgrounds at the right size and the result will be optimised since you will have reduced the size of your images and therefore the page load time for your shop.
These are the two images that we will use in this example:


The two images will be tiled to fill the entire page since they are small (256×256 pixels). However, the repeat is not necessary to achieve this result with the larger images. We are here setting “Background repeat” option to “repeat-y”.
To do this, find an image for each of the columns, then navigate to the parameters for the module. Create your association rule as per your needs, then navigate to Manage Background Images. Create a background image for each of your columns and allocate the CSS Background type to them. Go to Background Options, then select By Hook under Background Position. Select the vertical position you need, then choose Left for the left-hand column or Right for the right-hand column. Fill out the other settings as per your needs and save the settings when you have finished.
Return to the page to which the rule applies and refresh it. You now have an image on each side of the page.

If you cannot see the images, check that no other rules conflict with the one that has just been created and that your images are among the first ones in the sort order you specified (under Association Rules).
Show Background Image in a Specific Block
You may want to allocate a background image to a specific block such as the <header> or the <footer>. There are not any presets for this type of hook. You will therefore have to tell the module where to put the image using the Edit CSS Styles parameter under Advanced Settings (activate Professional Mode to access this option).
You will need to identify the name of the block to which you want to assign the background. To do this, use the inspection tools you installed previously.
In this section, we will take the example of the <footer> block, which corresponds to the block at the bottom of the page.
Firstly you need to upload your image to your server. You can navigate to Manage Background Images and add the image using the module tool. Once you have selected the element, right-click on the preview and inspect-it. You will then see an <img> tag with a src="..." attribute. Copy and keep the URL between the quotes: this is the position of your image
If your image has already been added, edit and inspect it, just as you did to you retrieve its URL.
Now click the Advanced Settings Tab, then scroll to the end of the Edit CSS Styles area. We are going to add the code needed to display the image in the block <footer>.
Add the following code:
footer { background: URL("Enter your URL here"); }
Save this and then go back to your shop. Refresh the page and see the modified block, you now have an image that has been applied to only one block (the footer, in this case).
Background Image not Visible
You just added and configured a background image, but it still hasn’t appeared in spite of the performance of different tests. It is possible that the image conflicts with the theme currently installed on your shop.

To remedy this, locate the block in which your theme already shows an image, preventing the new background from showing. To do this, you must go to the area where your new image is supposed to appear, then inspect it using Firebug.

The current theme has already applied a behaviour to the <header> block in this example. This therefore hides the background that we want to apply to this <header> block. To remedy this, go to your back office and navigate to Advanced Settings. Use the second selector, add a comma, then indicate the name(s) of the block(s) that is hiding your image from the inspector, separating them with commas.

Save this then refresh the page. Your background is now visible.