Presentation
A/B Fighting has been designed to allow you to easily and quickly introduce A/B tests on your PrestaShop shop. Thanks to statistics retrieved by Google Analytics, you can determine which variants of your pages are the most effective and therefore increase their conversion level.
General Points and Operating Principles
A/B Fighting supports an unlimited number of simultaneous tests and allows you to create variations of your pages for testing using templates (tpl), CSS and/or JavaScript files. It also allows you to insert inline CSS code or JavaScript in the pages that you want to test.
We recommend that you install the Google Analytics module on your shop and configure it correctly, in order to facilitate the use of this tool.
Installation
To install A/B Fighting, see our tutorial on how to install a module here
Configuration
ID
![]()
This allows you to set a unique identifier for your test. This identifier will be added to the URL for the page to be tested in order to display the variant instead of the original version. You can use the default option or enter a custom identifier.
Example:


Name of the A/B Test
![]()
This allows you to set a name for the A/B test and thus helps you organise the tests.
Only you will be able to see the name defined here, in the back office, your clients will not be able to see it.
Google Analytics Test Key
![]()
The test key provided when you create the test on Google Analytics must be entered here. Go to the test configuration to find this key. It is given in Step 3, when you click Insert Code Manually and scroll down below the code.
Pages to be Tested
![]()
This allows you to choose the pages to be tested.
Restrict to Specific …
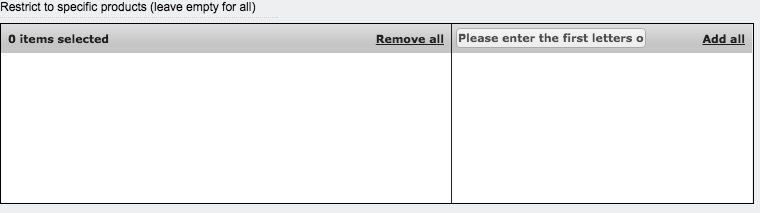
This allows you to restrict the test to one or several pages, from the type of page selected above. Leave this table empty to include all the pages for the type of page to be tested into account during the test.
Activate
![]()
This allows you to show or hide the version to be tested. You can modify this parameter at any point in time. If the test has been deactivated, your clients will only see the original version.
Use Specific Template File
![]()
This allows you to use a specific template file instead of the one normally used. This alternative template file will be placed in your theme folder, so that you can select it in your test configuration. It will only be applied to the pages concerned by the test.
Add Specific CSS File
![]()
This allows you to insert an additional CSS file for the pages concerned by the test. This file must be in the CSS folder for your current theme.
Add Specific JavaScript File
![]()
This allows you to apply an additional JavaScript file to the pages concerned by the test. This file must be in the JS folder for your current theme.
Specific CSS Rules
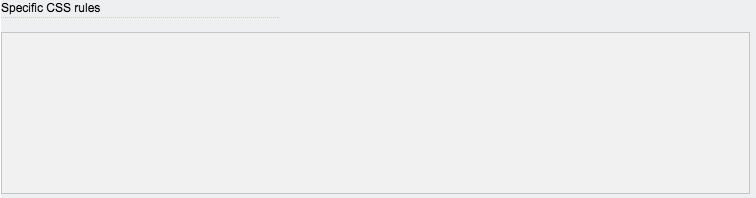
This allows you to insert inline CSS code on the pages concerned by the test.
Specific JavaScript Rules
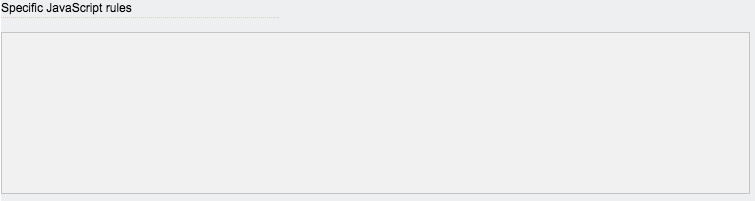
This allows you to insert inline JavaScript code on the pages concerned by the test.
Configuring an A/B Test
Configuring a standard A/B test
The following section is dedicated to the implementation of an A/B test for a given page.
We recommend that you use the Google Analytics module so that you don’t have to modify any code.
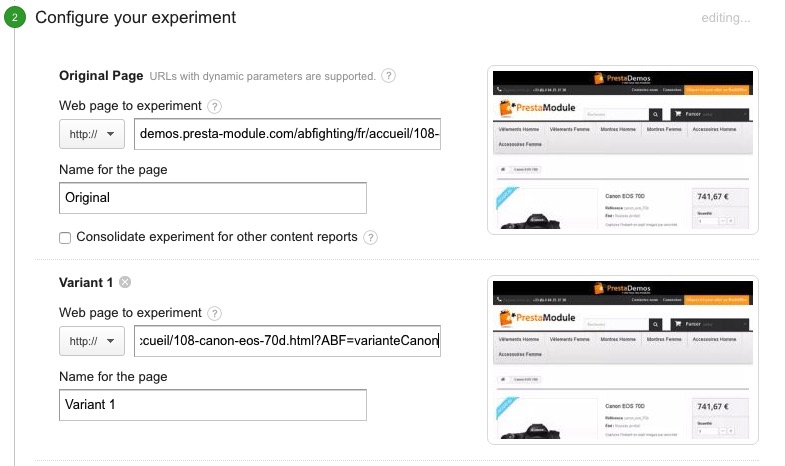
To create this A/B test, we are going to create a new test in the back office interface for the module.
![]()
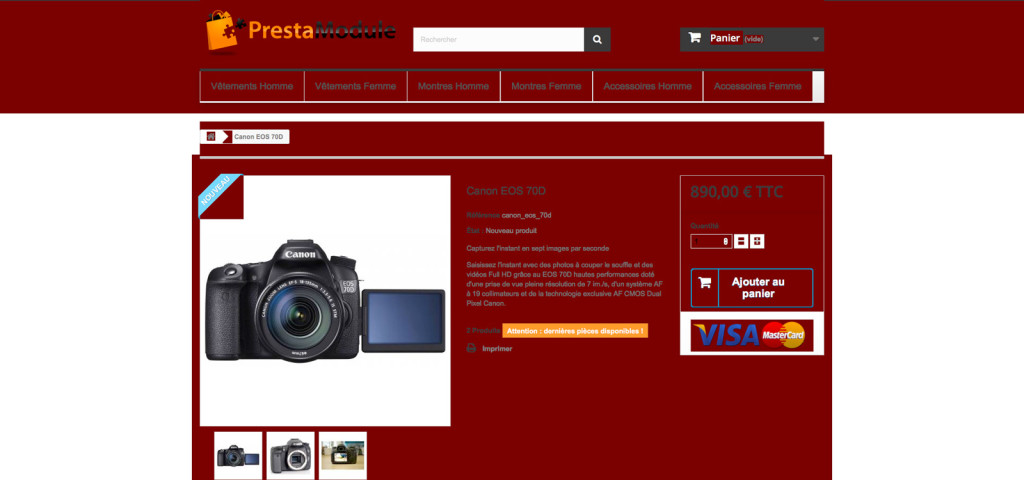
In this example, we are going to create a variant for the product page for a camera. The variant for this page will change the color of the elements to dark red.
To do this, you need to enter a new identifier (ID) if you want to change it, a name for your test and the Google Analytics test key.
You need to go to the Google Analytics site and log in to retrieve this key.
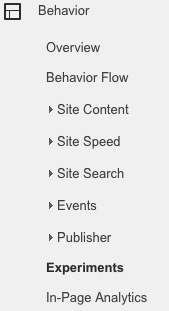
Go to the Behaviour menu, then click Experiments.
Create a new test by clicking Create Experiment.
![]()
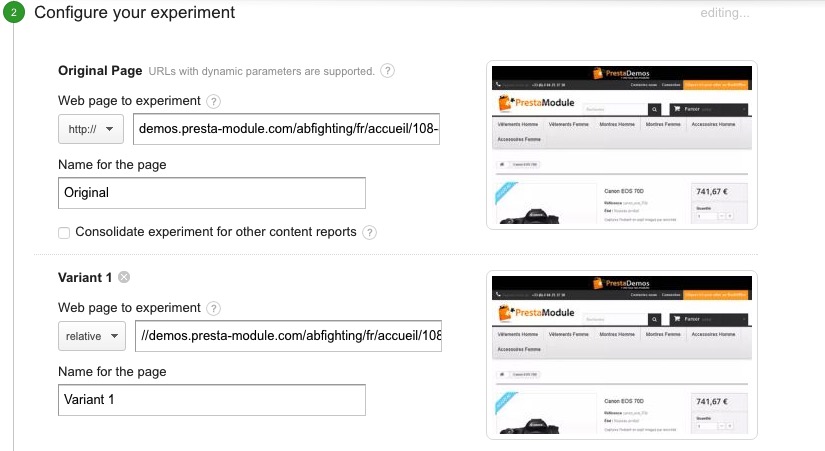
Fill out the first configuration page according to your needs. The second configuration page is the one that interests us. This is where we are going to tell Google Analytics which page must be tested.
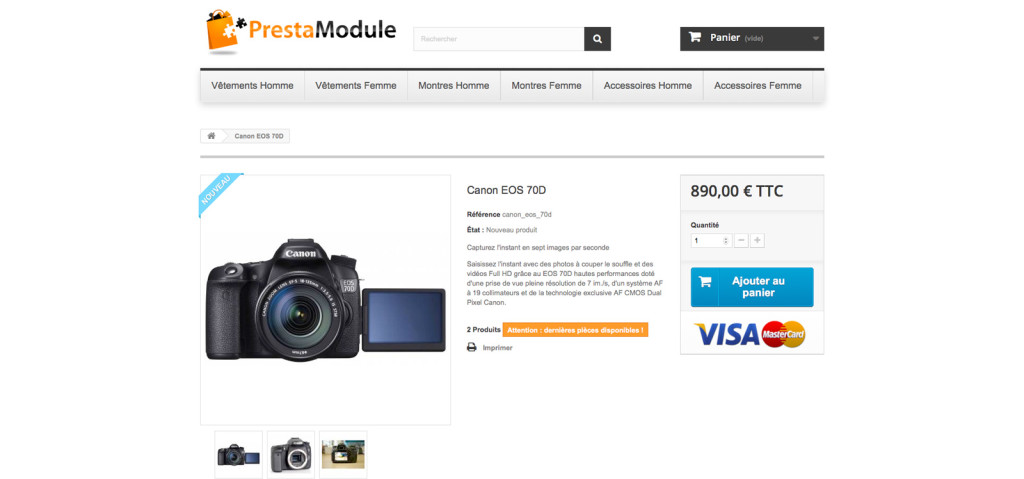
The first block is dedicated to the origin page (Version A). so enter its URL, along with the appropriate protocol (http or https, depending on your shop).
You can also name it. This name will only appear in your statistics and not on the page in your shop.
The second block is dedicated to the page variant (Version B), i.e. the version that will comprise the elements in red in this example. Its URL is therefore the same as the previous one, but you should add the following at the end: ?ABF=YourTestID.
The ?ABF= part will always stay the same. Your test ID (the one that you may have modified in the back office interface for the module) must be copied exactly (case-sensitive)
In this example, we add ?ABF=varianteCanon to the end of the the URL.
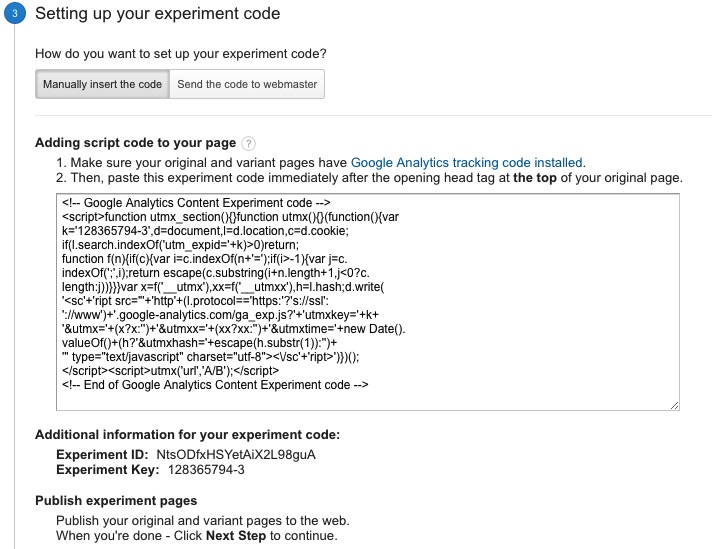
Then move on to the following step to retrieve the test key, by clicking Insert Code manually. Scroll down the page. It is below the code for your Google Analytics test key. Copy and paste it into the field provided to this end in the back office interface for the module.
Once your Google Analytics test is saved, go back to the configuration for the back office module.
Since the test concerns a product, we’ll set Pages to Test to Product. The following table allows us to further restrict the test to a selection of products. To do this, enter a few keywords in the search box (“Canon”, in our example), then click the plus sign in the list of results for each product that you want to test.
Do not select any products if you want to apply the test to all the products in your catalog. See the following paragraph in this case.
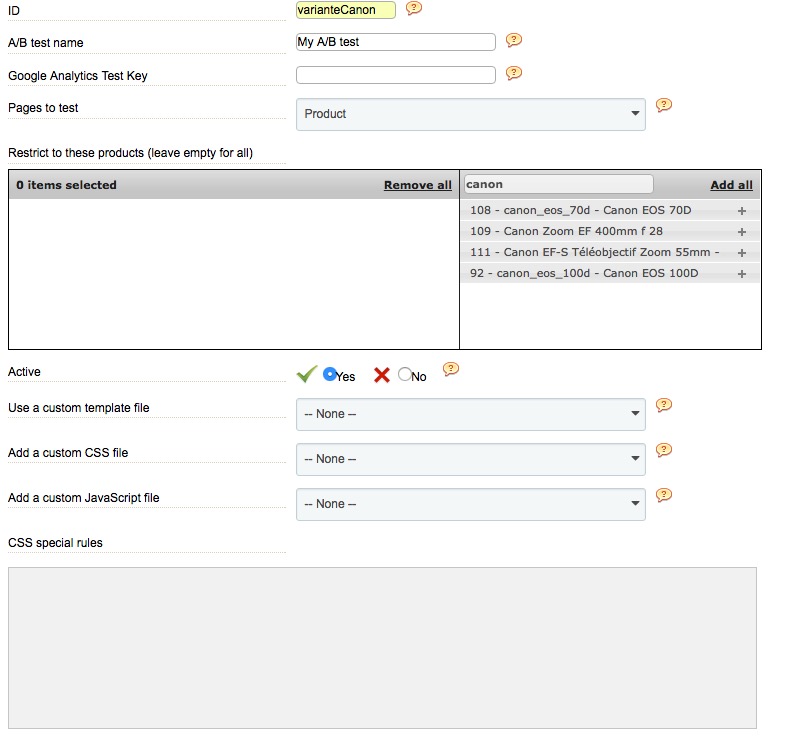
Don’t forget to activate the test – it is deactivated by default
We are going to use the CSS Specific Rules field to show the elements in red, inserting the following code:
* {background-color:#700000;}
This code turns all the elements that can be modified dark red.
Save the configuration and your test is ready to use.
Go to the page in question.
There are two possibilities. Either you land on the original page and you don’t see anything different or you land on the variant page and your page will, in this example, comprise red elements. You should know that it is Google Analytics that defines who sees which version of the page and it is not possible to change this.
When you land on this page, you should see additional text appear after the URL. This is completely normal and has been generated by Analytics.
You can, however, see the result of your variant page by adding &ABF=YourTestID to the end of the URL if it has new elements, or add ?ABF=YourTestID after the page extension (e.g. add ?ABF=YourTestID after the .html forhttp://demos.presta-module.com/abfighting/fr/accueil/108-canon-eos-70d.html, and delete the text added by Google).
You should, however, not use this process too often or you will falsify your statistics.
Configuring a Test for a Set of Pages
We recommend that you use the Google Analytics module so that you don’t have to modify any code.
You will need to configure Google Analytics accordingly if you want to apply your A/B test to an entire category of pages (we will use product pages for the example). In fact, although the module natively supports this option, Google Analytics is not very clear on this feature.
To carry out an A/B test on all your product pages, start by creating a new test in the back office interface for the module. Fill out the required fields, but leave the Google Analytics test key field for now, it will be filled out later. When you get to Pages to Test, select Product, then proceed with configuration without applying any restrictions. Once you have completed the rule, go to your Google Analytics account.
Find and click the Behaviour submenu on the left-hand menu bar, and then select Experiments.
You now see a list of your ongoing tests. Click Create Experiment, above this list.
![]()
Fill out the first configuration page according to your needs. The second configuration page, however, must include several essential parameters for the module to work properly.
The URL for the page to be tested is the first piece of information required. Enter the protocol for your shop (http, https), then the URL for the page required. You can name it. This does not have any effect on your shop or your visitors, this name will be displayed in your statistics. The page variant is the second piece of information required. To analyse an entire category of pages, the product pages in this case, you need to select the appropriate protocol, then add ?ABF= followed by the ID for your A/B test in the back office interface for the module. Then click next.
Finally, select Insert Code Manually. The test key is below the code block. This is the character string you need to enter into the Google Analytics Test Key field. This is the key you will need to insert into the Google Analytics Test Key field for the module A/B test.
Complete the configuration of your test on Analytics, and confirm it.
Your product page test is now operational.