Presentation
Multiple Features Import is a module that allows you to import multiple features using PrestaShop’s native import tool. All you need to do is indicate the separator for multiple values and import your CSV file, the module does everything else for you.
General Points and Operating Principles
Multiple Features Import requires the Presta-Module Multiple Features module in order to work. You can’t use multiple import if the multiple features provided by our module are not available. Your feature would then be displayed as Cotton|Silk|Wool, instead of being separated into 3 separate values.
What is more, the module needs you to define the multiple values separator that you have used, so as to import the information correctly. You need to use this character or your import will fail.
Finally, know that the module uses Prestashop’s native import tool and does not modify it, so you can also use it for standard imports.
Installation
To install Multiple Features Import, see our tutorial on how to install a module here
Configuration
Features Separator

This allows you to set the separator used to separate the different values for a feature in the file to be imported.
Tutorial
You need to use specific formatting to import products with multiple features. Define your separator in the module configuration (the default character | is used in this example), then go to your CSV file.
The column containing the features should be in the following format:
FeatureName:Value|Value2|Value3,FeatureName2:Value|Value2|Value3.
Example: Color:Red|Black|Blue, Material:Cotton|Silk
The features and values will be automatically created if they are not already in your catalog.
PrestaShop’s import system allows you to upload a CSV file with your data (with UTF-8 or ISO-8859-1 encoding). Once the file has been imported, you can match your columns with the existing information on the product, category and supplier sheets, etc., via the simple graphic interface.
This section aims to provide an example of a product import with multiple features. It is recommended that you back up your shop before you start, so that an error does not destroy your entire catalog. Navigate to Advanced Parameters in your PrestaShop shop and click Database Backup and follow the instructions.
Once you have backed up your database, navigate to Advanced Parameters -> Menu. This takes you to this page:
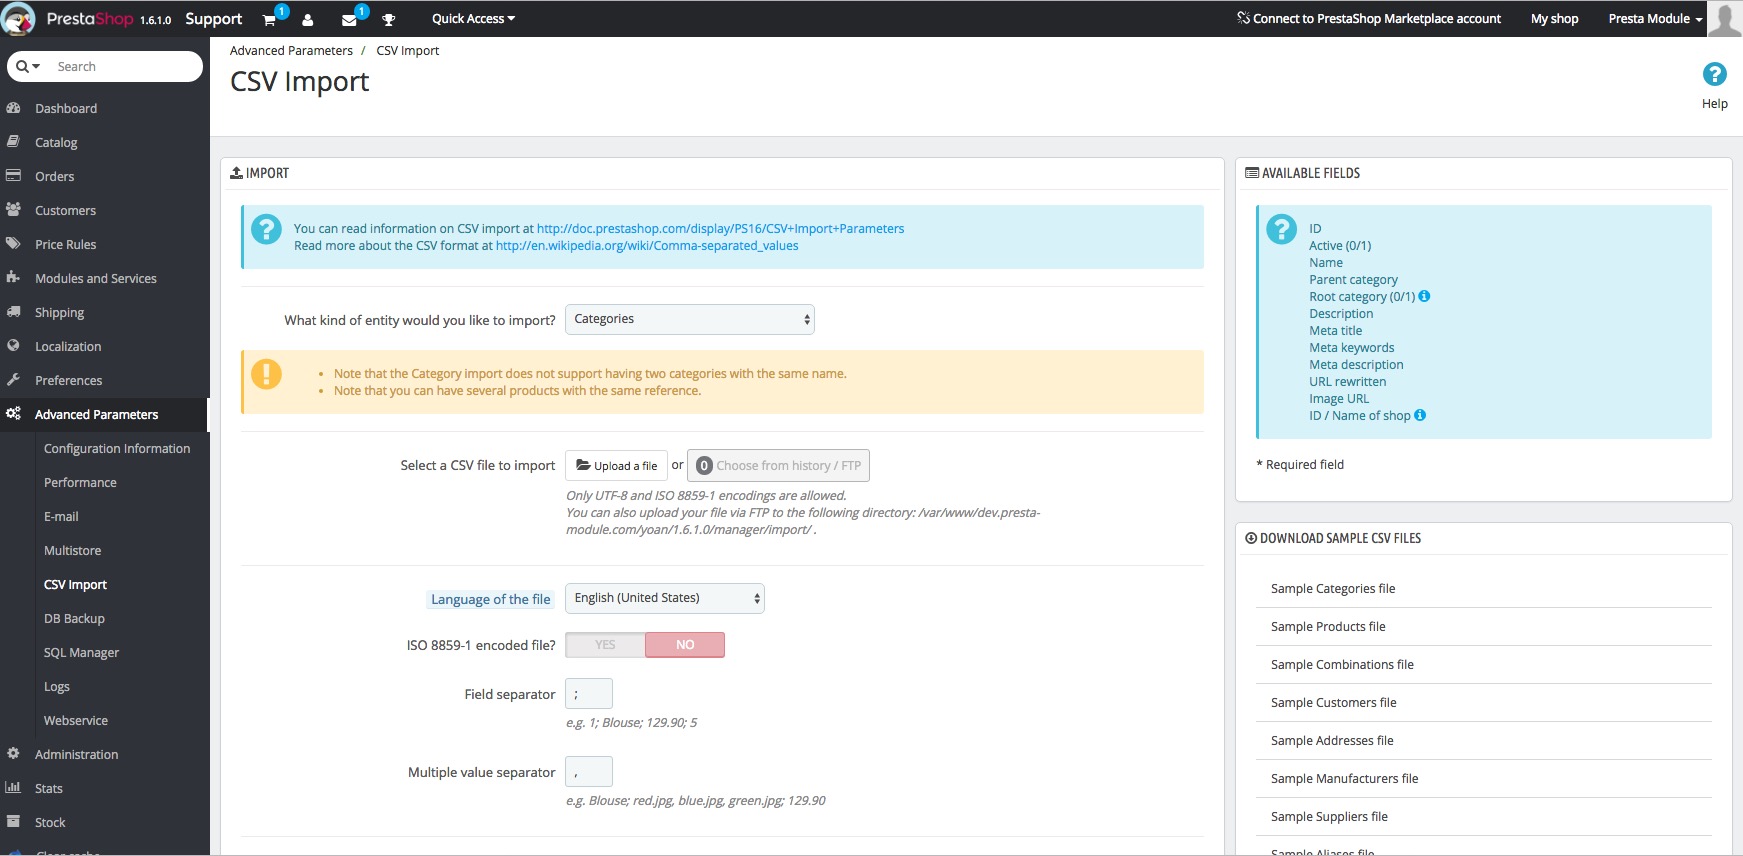
You need to start by selecting the type of data to be imported. For this example we are going to import products with multiple features. Select Products from the dropdown list.
The tool then prompts you to select the language of the file that you want to import, from among all the languages currently installed on your shop.
Import your file using the button provided to this end or select a file that you already uploaded for a previous import by clicking Choose from history
State if your file uses ISO-8859-1 encoding using the slider provided.
Selecting NO, is the same as stating that the file uses UTF-8 encoding.
Also enter the different separators you use in your CSV file if they are different to the default values.
The following 4 options may have an effect on your current catalog (use with care!):
– Delete all products before import: this allows you to delete your ENTIRE catalog before proceeding with the import. Be sure to deactivate the modules that manipulate your products in order to avoid errors on deletion (such as Advanced Pack, for example).
– Use product reference as key: this allows you to use the product reference as the key, which means the references must be unique otherwise this will create a conflict in your database and generate errors on your shop.
– Do not regenerate thumbnails: this allows you to not regenerate the thumbnails fo the products imported.
– Force all ID numbers: this allows you to force the use of the ID numbers of the products imported. PrestaShop will automatically generate the ID numbers you need for your products if you do not force the ID numbers.
Click Next Step when you have done this.
Your shop will then import the CSV file selected and display the data in a table.
There are two fields at the top of the page:
– The first one allows you to save the configuration that you have just used under a specific name, so that you can use it again for future imports.
– The second one allows you to define the number of lines to be ignored when the file is imported. Enter the number of lines that do not correspond to data (header lines, for example).
The following table requires mapping for the data to be imported correctly.
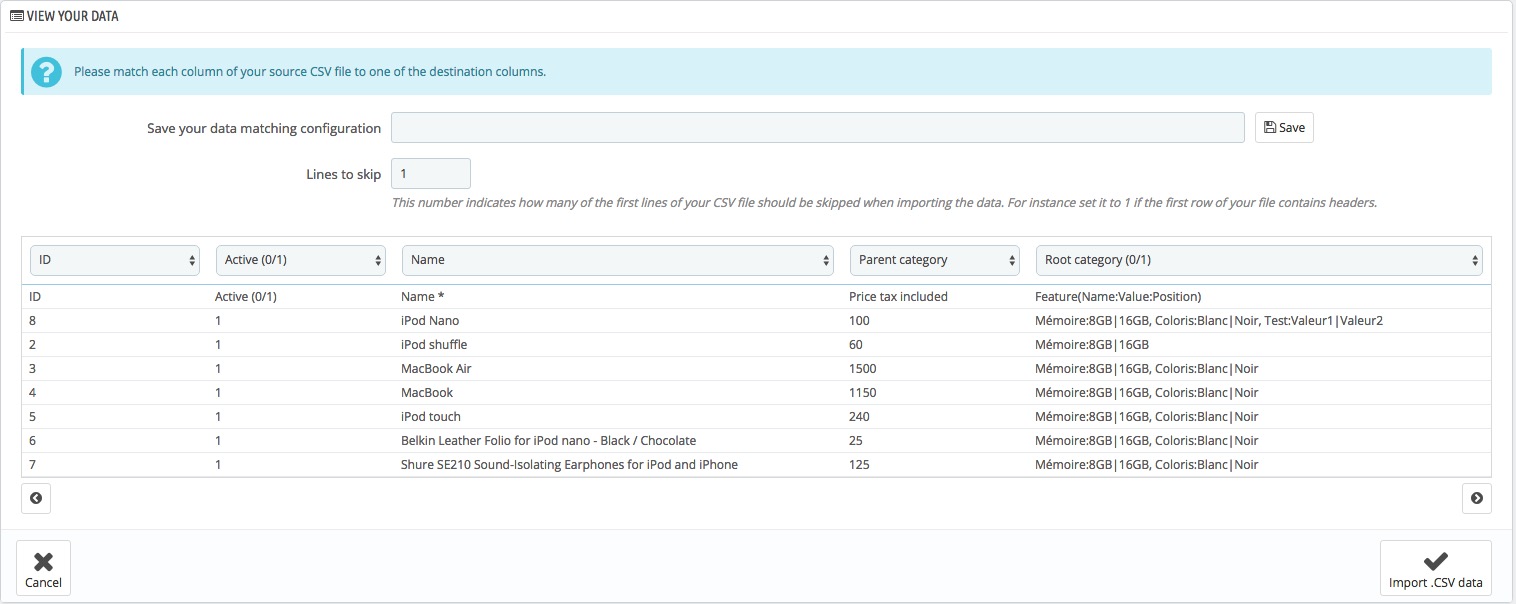
There is a drop-down list at the top of each column. Just tell your shop what the given column corresponds to, from the values provided by PrestaShop.
For example, the last column in the file used in this example corresponds to the Features field. Features (Name:Value:Position:Custom) should therefore be selected from the drop-down list at the top of the column. Multiple Features Import will automatically retrieve the multiple values and assign them to the relevant product.

Simply map the different fields and then click Import .CSV data.
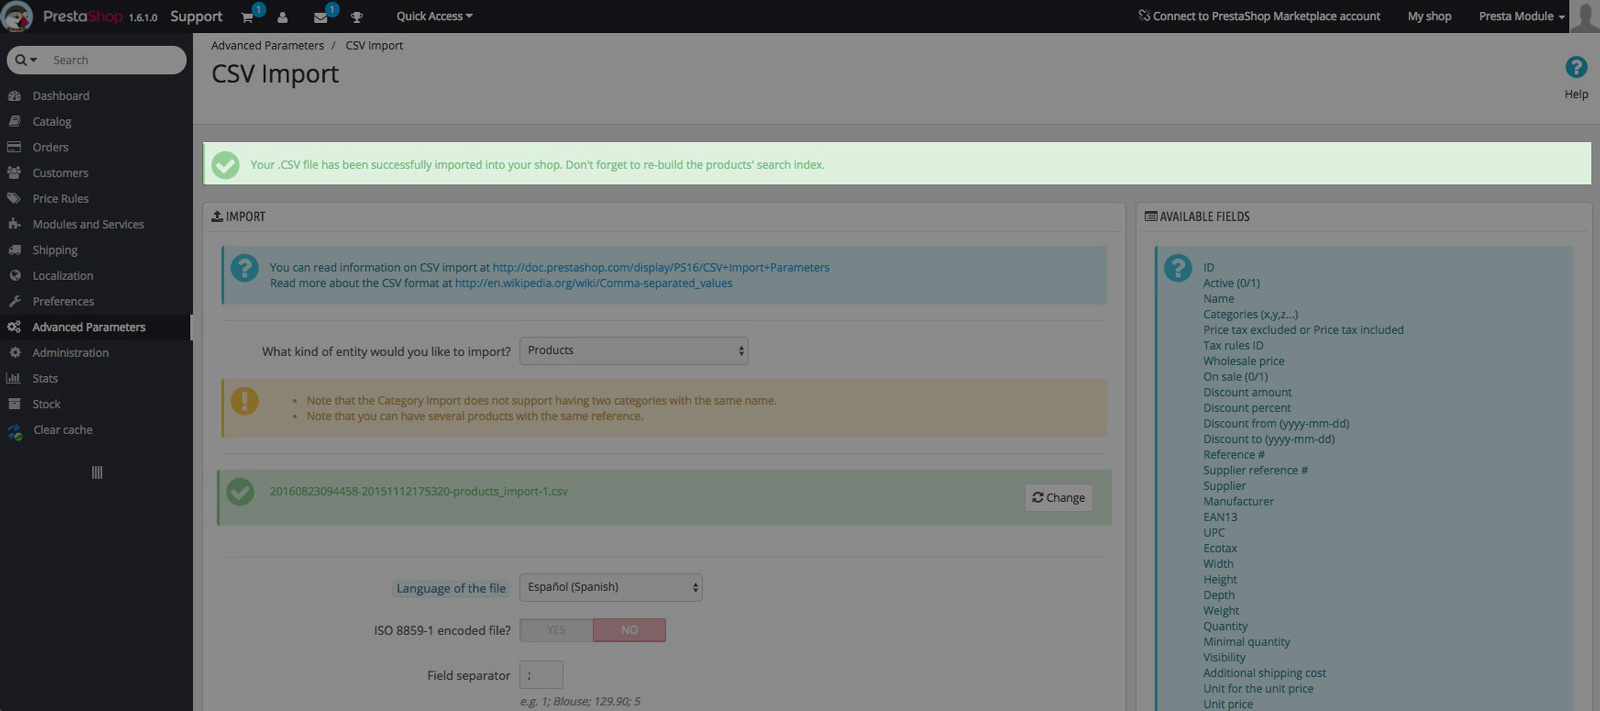
The data has now been imported into your shop.
PrestaShop will then tell you to re-build the search engine index for your shop so that the newly imported products can be found.
To do this, navigate to Preferences -> Search in your back office. You will see the following block in the middle of the page:

Click on Re-build the entire index and wait for a few moments. Your products will be fully operational when this operation is complete.