I- Presentation
Advanced Pack enables you to increase your average shopping cart by offering your customers a coherent set of products, called a pack, at an attractive price. Your customers can personalize their pack by choosing their preferred combination from among those you’ve made available. On your side, order and stock management is extremely simple.
II- Installation
To install Advanced Pack, please refer to our tutorial on module installation available here.
III- Graphic integration
Advanced Pack can be installed and used without any graphic adjustments if your site uses PrestaShop’s default themes (version 1.7 or 8). The module comes with a set of templates based on these themes, which you’ll find in the /views/templates/front/ folder.
If your store has a theme other than the default ones, custom integration work may be necessary.
IV- General information and operating principles: order and inventory management
Ordering a pack is managed in such a way that you retain the advantages of ordering separate products. First of all, the pack stock is calculated from the stocks of its products. There’s no need to define stock at pack level. Each time a pack is ordered, individual product stocks are automatically deducted. Then, on the invoice and order details in the back-office, each product appears on a different line, as if it had been ordered separately.
This has major advantages:
- No surprises when it comes to inventory: for each product, you have just one stock to manage, whether the product is sold on its own or as part of a pack. You avoid the complexities of managing two different stocks for the same product. Your warehouse workflow is not disrupted.
- Refunds and returns are managed on an individual product level. Your customers don’t need to return the whole pack if just one of the products in the pack doesn’t fit. It is possible to refund only one product in the pack, or to put a returned product back on sale.
- Your statistics modules on your store’s best sales will be able to count sales from packs correctly.
- Easy management of products with different VAT rates: the invoice displays the tax amount for each different VAT rate
- Pack orders can be exported to an ERP-type management and analysis system, without having to make any technical modifications to enable it to take pack orders into account.
What’s more, if one of the products (or a specific combination of a product) in a pack is out of stock, the pack will automatically be indicated as unavailable for purchase using an availability alert system. No risk of you receiving orders for unavailable products! An option also allows you to force the display of another combination if the default combination is out of stock.
Note: if you disable stock management in your PrestaShop store, the module will assign a stock value of 10,000 pieces to your packs to avoid annoying side effects on product list pages.
V- Configuration
1/ Settings for Pack page
a) Display mode
This option lets you define the template that will be used to display “pack” pages.
For a simple display, do not activate the following option:

This mode uses the template of a product page, allowing minimal integration work with your theme, since the pack will be displayed as a classic product.
Example:

For an advanced display, activate the following option:

This mode will use a customized template, which you can then customize. However, some integration work may be required to adapt your theme to this new template.
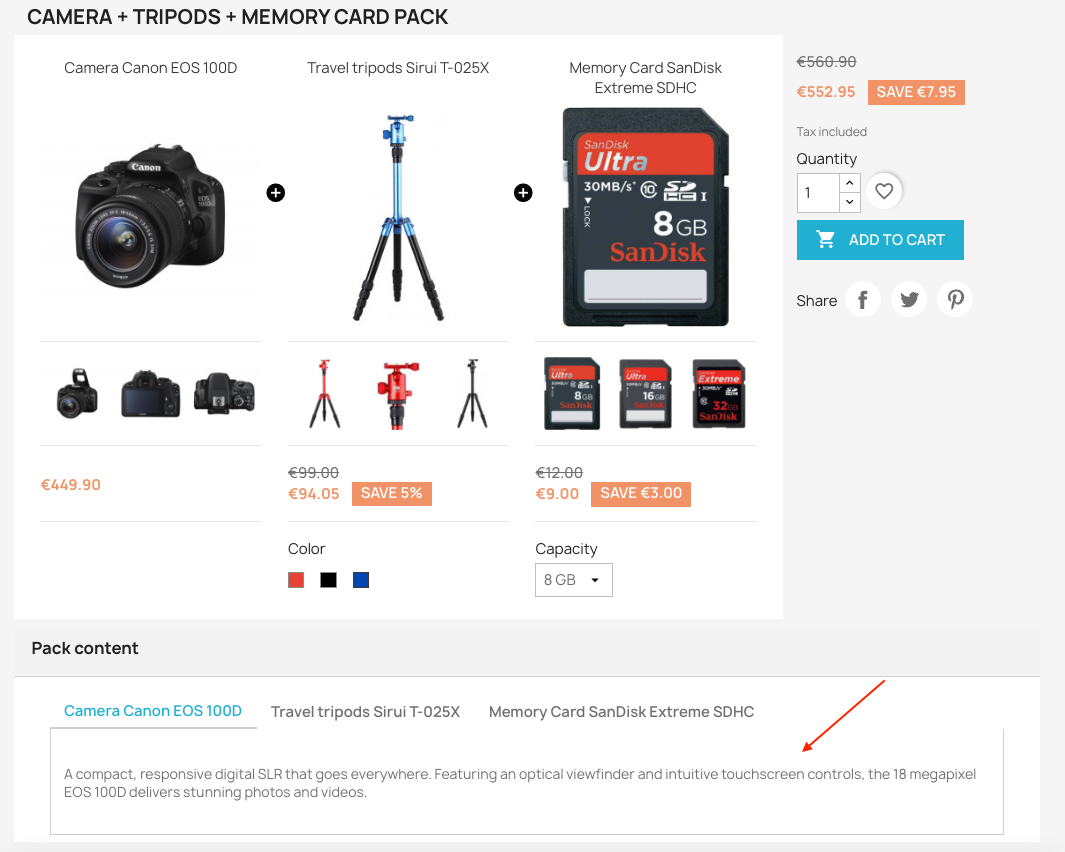
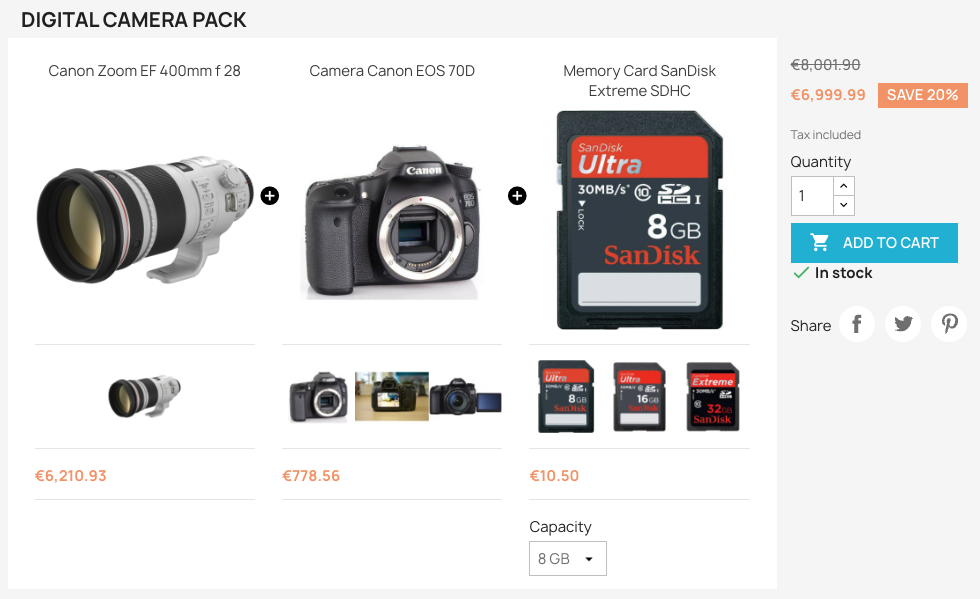
Let’s take the same pack as above. Here is an example of advanced display:

For the rest of the documentation, we’ll assume that advanced display is enabled.
b) Automatic buy block scrolling
If the advanced display mode is activated, you can enable automatic scrolling of the buy block (block containing the add-to-cart button) when scrolling (using the scroll bar):

c) Display settings
If you want your customers to be able to choose the number of copies of each product in the pack, activate the following option:

Please note: this will ONLY work for packs for which you have checked the following options:
- Do not apply any discount for this pack
- Inherit discounts for all products in the pack
- Allow product removal from the pack
This option allows you to activate or deactivate the display of a quantity selector for each product in the pack:

If the option is deactivated, a non-modifiable quantity indicator will be displayed for each product in the pack.
Note
When the “Provide an option for the customer to choose the quantity of each product to be included in the pack” option is active, your customers can not only modify the quantities of the products making up your pack, but also remove some of them. The pack as you have created it (with defined quantities) is therefore modified. So, if the customer modifies the quantities of the products or removes some of them, adding them to the shopping cart will be equivalent to adding each product individually (the “pack” is no longer considered as such). Your customer will therefore not see the pack in his cart, but its contents (with the quantities he has chosen).
For example, this pack contains three products, and is configured so that you can choose the quantity of products in it:

If the quantity is not altered, then the pack appears in the cart as a single product:

If, on the other hand, the quantity is modified (for example, if we remove the memory card by clicking on the remove icon at the top right of the product), adding the pack to the cart will be equivalent to adding each individual product to the cart (except that we do it all at once):


The pack does not appear in the cart, but rather its contents, as if the products had been added from their respective pages.
Show thumbnails for the products in the pack
If you want to display the images of each product in the pack, activate the following option:

The images of the products in the pack (including combinations) will then be displayed under the main image of each product, as thumbnails.

Display the individual price for the products in the pack
If you want to display the individual price of the products in the pack, activate the following option:


To hide them, deactivate it.
![]()

Restrict product images to the combination selected?
If you want only the images associated with the selected combination to be displayed, then activate the following option:

Thus, if several images are associated with each product combination, only those corresponding to the combination selected by your customer will be displayed under the main image.
Example:

In this example, the option is activated and we see that only images associated with the selected combination are displayed (those corresponding to the tripod’s blue combination).
Please note: images + combinations must be correctly matched on the product file in order to benefit from this feature.
On the other hand, if you want all the images of the products in the pack to be displayed, regardless of the combination selected, then select “No” for the following option:


In this example, with the option deactivated, we can see that all images are displayed and scrolled under the products, regardless of the combination selected (blue is selected for the tripod, but the images corresponding to the red tripod are still present).
Display the description for the products in the pack
![]()
This option displays long descriptions of the products in the pack:

Warning: the risk of an SEO penalty for duplicate content is high if you display both the short description (see below) AND the long description of your products.
Display the short description for the products in the pack
![]()
This option displays short descriptions of the products in the pack:
The risk of an SEO penalty for duplicate content is low (provided you don’t also display long descriptions).
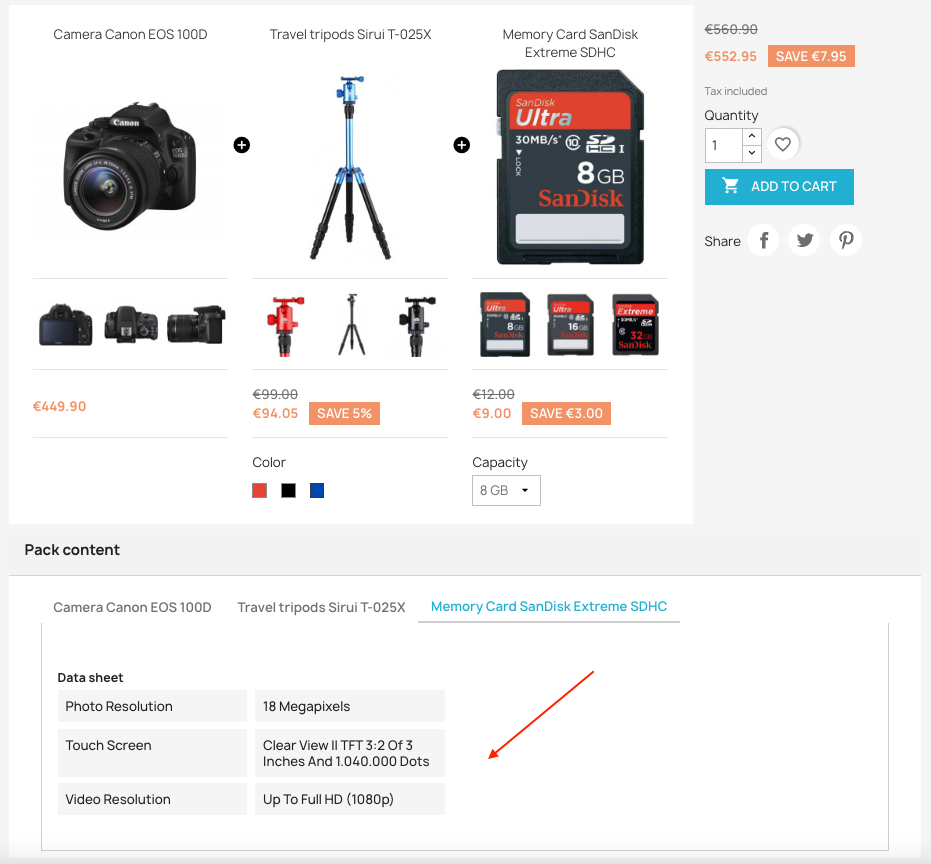
Display the features of the products in the pack
![]()
This option displays the features of the products in the pack:
Display the availability information for the products in the pack
![]()
This option displays the availability of each product in the pack (in stock, out of stock, or customized messages):

d) Style settings
Background color for the ribbons (used to display the quantity)
This option lets you choose the background color of the ribbons that will be displayed on the products in your pack.
Please note: when adding a product to your pack, you will need to enter a quantity greater than 1 for the ribbons to be displayed.
Text color for the ribbons (used to display the quantity)
This option lets you choose the color of the text displayed in the ribbons.
Product separator color
This option lets you choose the background color of the icon separating your pack’s products.
Please note: the “+” sign will always remain white. Choose a different background color, or your icon will disappear.
Color of the “Remove Product from Pack” icon
This option lets you choose the color of the icon used by your customers to remove one or more products from the pack.
Please note: as a reminder, to activate the removal of a product from a pack, your pack must be made up of at least 3 products, it must not have any discounts, the “Allow product removal from the pack” checkbox must have been ticked, and each product in the pack must have the “Inherit discounts?” checkbox ticked. An icon will then appear, allowing your customer to remove a product from the pack.
Color of the “Re-Insert Product into Pack” icon
This option lets you choose the color of the icon allowing a customer to re-enter a product previously removed from the pack.
Please note: for this to work, your pack must be made up of at least 3 products, it must not have any discounts, the “Allow product removal from the pack” checkbox must have been ticked, and each product in the pack must have the “Inherit discounts?” checkbox ticked. Once your customer has removed a product, the icon for reinstating it will appear.
e) Image settings
Main product image size
This option lets you choose the size of the images illustrating the products in the pack.
Main product image size (mobile)
This option lets you choose the size of the images illustrating the pack’s products on mobile devices.
Product thumbnail size
This option lets you adjust the size of the thumbnails of the products offered in your packs.
Size of the zoom image for the products
This option lets you choose the size of product images when your customer clicks on them (image zoom). We advise you to choose this size according to the size of your product images. If you set a zoom size larger than your product image, the image will be displayed and surrounded by white to fill the block.
2- Settings for the “This product is also available in pack” block
Display the “This product is also available in pack” block

This option allows you to display a cross-selling block on the product page, indicating that the product is also part of one (or more) pack(s). The “pack” offer can encourage customers to buy the product as part of a pack rather than on its own:

Maximum number of packs to be displayed

A product can belong to several packs. This option therefore lets you define the maximum number of packs containing the consulted product to be displayed in the cross-selling block. Enter 0 if you want to display all packs containing the consulted product, regardless of their number.
Packs sorting

This option lets you sort the packs displayed in the cross-selling block by ascending or descending creation date, ascending or descending price, or randomly.
Display “View this Pack” button
![]()
This option lets you display a “View this pack” button for each pack in the cross-selling block. This button will redirect the customer to the pack’s page:

Display “Buy this Pack” button
![]()
This option allows you to display a “Buy this pack” button for each pack in the cross-selling block:
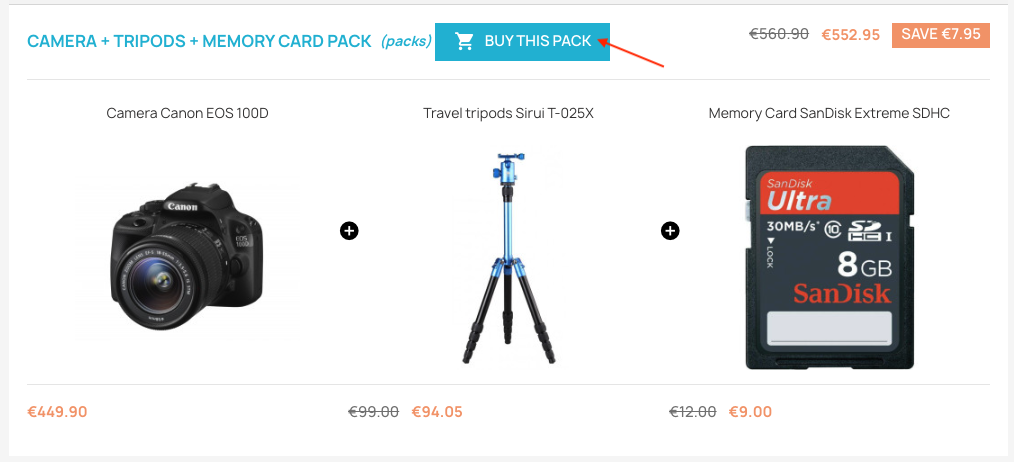
Unlike the “View this pack” button, the “Buy this pack” button adds the pack directly to your customer’s shopping cart.
Main product image size

This option lets you choose the image size of the products in the packs displayed in the cross-selling block.
3- Bundles settings
Do you have products that can be packaged in bundles of several units? Offer your customers the chance to save money by ordering a product in a bundle (several copies grouped together in a package) rather than individually, thanks to a dedicated offer. They can order the bundle directly from the product sheet.
Thumbs image size

This option lets you define the size of bundle thumbnails.
Default category

This option lets you define the category to which a bundle will be associated, by default.
4- Specific settings
Prefix to be added to each product name
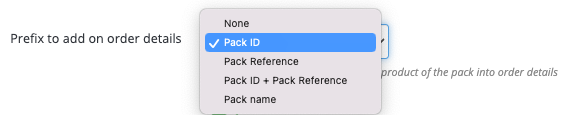
This option lets you choose the prefix to be added to each product from a pack, in the order summary.
Set higher priority to combination in stock

This option allows you to display the first combination in stock if the default combination is unavailable.
Postpone pack price update (you must use CRON URL if so)

Activate this option to disable the updating of specific prices on the pack in the BackOffice (this will improve the speed of product registration).
Postpone pack available quantity update (you must use CRON URL if so)

Activate this option to deactivate the update of available pack quantities at the time of order.
Pack attributes selector
If the pack content displays as a string of characters in the cart/add to cart modal, use this option to indicate to Advanced Pack which CSS selector(s) to use to replace this string with the actual pack content, separated by a comma.
VI- Create a pack
To create a pack:
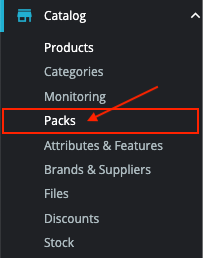
Go to the left-hand menu of your PrestaShop back office, then in the “Catalog” section, click on “Packs”:
Click on “Add a new pack”:

Set a name for your pack, in any of your store’s languages:

In the “Pack configuration” tab, go to the “Pack content” section. Start typing the name of the first product to be included in your pack (or its reference) and select it from the list that appears:

Do the same for all the products in the pack.
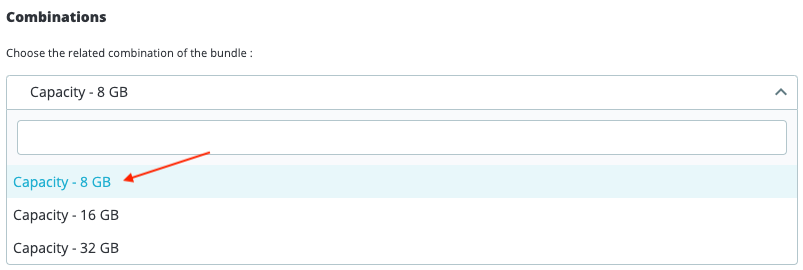
If a product contains combinations, you can check only those you want to make available for sale in packs. Also select the combination you want to display by default (this may be a different combination from the one defined as the default combination for sale of the product outside the pack):
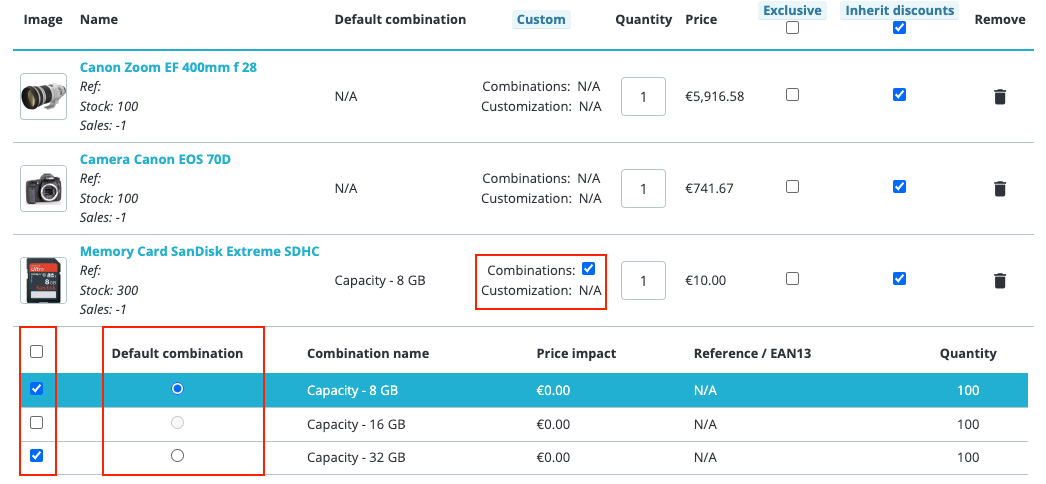
In this example, the 16 GB combination will not be offered for sale as part of a pack (it may, however, be offered on the page of the product alone).
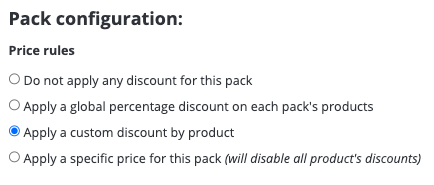
Define the commercial offer to be associated with the pack. You have 4 possible choices:
- Do not apply any discount for this pack
- Apply a global percentage discount on each pack’s products:

In this example, we have defined a 20% discount on the entire pack:

- Apply a custom discount by product:
In this case, you can define a different discount for each product (or product combination) in the pack, either as an amount (excl. VAT) or as a percentage.

In this example, we’ve decided to apply a €5 (€6 inc. VAT) discount to the zoom, a 20% discount to the camera, a 15% discount to the 16 GB memory card capacity and no discount to the 8 and 32 GB capacities.


- Apply a specific price for this pack (will disable all product’s discounts):
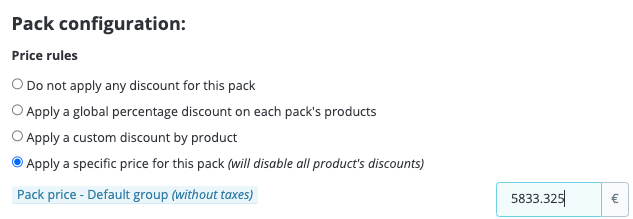
For example, a psychological price of €6999.99 (incl. VAT) can be applied to the pack to bring it just under €7000 (incl. VAT):
Save.
The profitability calculation wizard on the right gives you a precise overview of your pack’s price in real time.
Please note: The “Allow product removal from the pack” option is only available when no discount is applied, and the “Inherit discounts” checkboxes of all products in the pack are ticked.
VII- Create a bundle of products
To create a bundle of several copies of the same product:
Go to the product sheet in the back office and click on “Add bundle”:

Enter the number of copies of the product contained in the bundle, for example:

then a name for the products in the bundle:

Give the bundle a name (optional):

Associate it with a badge (optional):
![]()
Select the combination concerned by the bundle:
and the image associated with the bundle:

Finally, define the discount applied to the bundle purchase and save:

Save the product sheet:

Go to the front office of your store, on the product page concerned: a box corresponding to the bundle should be displayed, click on it:

This takes you to the page where your customer can buy the bundle directly, rather than just one copy. Click on the little red cross to return to the single product page:
